
To guarantee safe and effective salt bridge and mush fixes, you should wear proper safety gear like gloves and eye protection before starting any repair. Disconnect the battery or device, work in a well-ventilated area, and handle components carefully to avoid leaks or damage. Proper procedures prevent electrical issues and prolong battery life. Keep in mind common mistakes and maintenance tips—continue exploring to learn more about performing these repairs safely and correctly.
Key Takeaways
- Always wear safety gear like gloves and goggles when handling salt bridges or applying mush fixes.
- Disconnect the battery from power sources before performing any repairs to prevent electrical hazards.
- Use proper tools and neutralizing agents to avoid damage and ensure safe, effective repairs.
- Thoroughly clean corrosion or leaks to prevent future electrical issues and ensure good connections.
- Follow step-by-step procedures and safety protocols to maintain battery integrity and prevent accidents.
Understanding Salt Bridges in Batteries

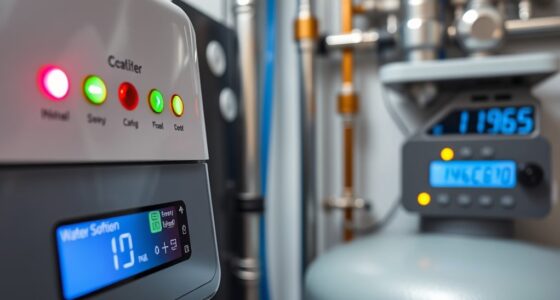
Salt bridges are essential components in batteries that help maintain ion flow and stabilize the internal environment. They play a crucial role in the battery chemistry by allowing ions to move between compartments without direct contact, ensuring consistent electrical flow. This process prevents the buildup of charge imbalances that can cause battery failure. Additionally, salt bridges contribute to corrosion prevention by reducing the risk of metal degradation inside the battery. By providing a controlled pathway for ions, they help keep metal components intact and functioning efficiently. Properly designed salt bridges boost performance and reliability, making them a critical element in maintaining healthy, safe batteries. Understanding battery components is key to appreciating how batteries operate smoothly and last longer.
What Are Mush Fixes and When Are They Used

Mush fixes are specialized solutions used to stabilize batteries and prevent swelling or leakage. You’ll typically use them when batteries show signs of swelling or damage, especially in high-demand applications. Their benefits include enhancing safety, extending battery life, and improving overall performance. Additionally, employing safety measures like mush fixes can be crucial in maintaining device integrity and user safety.
Definition of Mush Fixes
Mush fixes are specialized treatments used to repair and stabilize dental restorations, especially when traditional methods fall short. They’re often employed when existing restorations become loose, cracked, or damaged beyond simple repair. Think of it like battery maintenance or electrical troubleshooting—when basic fixes don’t work, a more targeted solution is needed. Mush fixes fill in gaps, strengthen weak areas, and restore stability quickly and effectively. You use them when conventional repair techniques fail to provide a long-lasting solution, ensuring your restoration functions properly. These fixes are versatile, cost-effective, and minimally invasive, making them ideal for addressing complex issues without removing the entire restoration. Fundamentally, mush fixes give you a reliable, temporary or semi-permanent way to restore dental function until a more permanent solution can be implemented.
Application Scenarios for Mush Fixes
When traditional repair methods can’t restore stability to damaged dental restorations, mush fixes become a practical solution. They’re especially useful in scenarios where other techniques fall short, such as delicate or complex repairs. In battery maintenance, mush fixes can help temporarily stabilize corroded contacts before a full overhaul. Regarding charging techniques, they offer a quick fix when connectors lose contact or become loose. Use mush fixes in these situations:
- Restoring compromised dental restorations with cracked or chipped surfaces
- Stabilizing loose or fractured dental bridges temporarily
- Addressing corrosion issues in battery terminals during maintenance
- Fixing loose connections before performing detailed repairs or replacements to ensure proper functioning
These applications help [GUARANTEE/ENSURE] safety and continuity, minimizing damage until a more permanent fix can be applied.
Benefits of Mush Fixes
Mush fixes offer a simple yet effective way to restore stability and functionality in damaged or compromised components. By applying a mush fix, you can improve battery maintenance, ensuring your battery remains reliable and extends its lifespan. These fixes help prevent corrosion, which is a common cause of battery failure and electrical issues. When used correctly, mush fixes create a protective barrier that reduces the risk of corrosion buildup and electrical shorts. They’re especially useful in scenarios where corrosion or damage has compromised connection points or terminal integrity. Overall, mush fixes provide an affordable, efficient solution to maintain your equipment’s safety and performance, reducing the need for costly replacements and ensuring your system stays operational longer. Utilizing proper maintenance techniques can further enhance the longevity and safety of your electrical systems.
The Science Behind Salt Bridge Functionality

Salt bridges work by maintaining electrical continuity between different parts of an electrochemical cell, allowing ions to flow smoothly and sustain the cell’s voltage. This process relies heavily on electrolyte transfer and ion exchange. Here’s how it works:
- The salt bridge contains electrolyte solution that facilitates electrolyte transfer, completing the circuit.
- Ions move from the salt bridge into the electrolyte solution of each compartment, maintaining charge balance.
- Ion exchange occurs as positive ions migrate toward the cathode and negative ions toward the anode.
- This movement prevents charge buildup, ensuring continuous electrical flow and stable voltage.
- The materials used in salt bridges are chosen for their durability and compatibility, ensuring long-lasting and effective operation.
Understanding this science helps you appreciate how salt bridges enable efficient ion exchange, vital for the proper functioning of electrochemical cells.
Step-by-Step Guide to Performing a Salt Bridge Repair

Before you start, make sure to follow all safety precautions to safeguard yourself during the repair. Then, carefully review each step of the procedure to ensure a smooth process. Paying close attention to safety and detail will help you achieve the best results. Additionally, understanding the influence of AI on music creation can inspire innovative approaches to troubleshooting and repair techniques.
Safety Precautions
Ensuring safety is crucial before starting a salt bridge repair, as working with electrical components and potentially hazardous materials can pose risks. Proper safety measures protect both you and the battery’s integrity. First, always wear insulated gloves and eye protection to prevent contact with corrosive electrolyte. Second, disconnect the battery from any power source to avoid electrical shocks. Third, work in a well-ventilated area to prevent inhaling harmful fumes during electrolyte management. Fourth, keep a fire extinguisher nearby in case of sparks or short circuits. Remember, maintaining safe practices is essential for effective battery maintenance. Follow these precautions to minimize risk while ensuring your repair process remains safe and controlled. Prioritize safety before proceeding with any salt bridge or mush fixes. Glycolic acid benefits can include safe exfoliation when used correctly, emphasizing the importance of proper handling during any maintenance process.
Repair Procedure Steps
To begin your salt bridge repair, gather all necessary tools and materials, including a clean container, distilled water, electrolyte solution, and protective gear. Proper battery maintenance relies on correct electrolyte management, ensuring your battery functions efficiently. Next, disconnect the battery and remove the affected cell. Carefully dissolve the salt bridge using the electrolyte solution, then rinse with distilled water. Rebuild the salt bridge by adding the electrolyte mixture, ensuring even distribution. Use the table below to keep track of steps:
| Step | Action |
|---|---|
| 1 | Gather tools and safety gear |
| 2 | Disconnect battery and remove cell |
| 3 | Dissolve old salt bridge with electrolyte |
| 4 | Rinse with distilled water |
| 5 | Rebuild with fresh electrolyte |
This process restores proper electrolyte management and improves battery longevity.
How to Properly Execute a Mush Fix
Executing a mush fix correctly is essential to maintaining the stability of your suspension system. To guarantee a proper repair, follow these steps carefully:
Properly executing a mush fix ensures suspension stability and vehicle safety.
- Turn off your vehicle and disconnect the battery to prevent electrical issues during the fix.
- Clean the affected area thoroughly, removing any debris or corrosion that can interfere with proper contact.
- Apply the appropriate filler or patch, making sure it bonds well to the existing material.
- After the fix, reconnect the battery and perform electrical troubleshooting to confirm the repair’s success and ensure reliable battery maintenance. Proper repair procedures are crucial for safety and effectiveness.
Safety Gear and Precautions for Battery Repairs

Before starting any battery repair, putting on the right safety gear is vital to protect yourself from potential hazards. Wear safety goggles to shield your eyes from acid splashes and gloves to prevent contact with corrosive electrolyte. Make sure your clothing covers exposed skin to avoid burns or irritation. When opening the battery casing, handle it carefully to avoid damaging the container or causing leaks. Proper electrolyte management is essential; work in a well-ventilated area to avoid inhaling fumes and keep a neutralizing agent nearby in case of spills. Using insulated tools reduces the risk of short circuits. Always disconnect the battery from power sources before starting repairs. Being aware of chemical hazards and understanding proper handling procedures can significantly reduce risks during battery maintenance. These precautions help ensure your safety while handling batteries and managing their electrolyte contents effectively.
Common Mistakes and How to Avoid Them

Many common mistakes during battery repairs happen because people overlook simple details or rush the process. One key error is neglecting to clean battery corrosion thoroughly, which can cause poor connections. Another mistake is ignoring electrolyte leakage, risking damage to surrounding components. To avoid these pitfalls:
Overlooking corrosion and electrolyte leaks can lead to poor connections and further damage during battery repairs.
- Always inspect for corrosion and clean it properly before proceeding.
- Check for electrolyte leaks and address them immediately.
- Use the correct tools to prevent accidental damage.
- Don’t rush repairs; take your time to ensure all issues are fully resolved.
- Ensure proper sealing and insulation to prevent future issues with battery safety.
Failing to follow these steps can lead to ongoing problems like reduced battery performance or further corrosion. Staying attentive to these details helps ensure safe, effective fixes and prolongs your battery’s lifespan.
Tips for Preventing Future Electrical Issues
To prevent future electrical issues, it’s essential to establish good maintenance habits and stay vigilant for potential problems. Regularly check your battery for corrosion, ensure terminals are tightly connected, and clean any buildup to maintain excellent battery maintenance. Practice electrical safety by inspecting wiring for wear or damage, and avoid overloads that strain circuits. Keep a visual checklist to spot issues before they escalate. Use this simple guide to help you visualize your maintenance routine:
| Task | Visual cue |
|---|---|
| Battery terminal check | Bright, clean contacts |
| Corrosion removal | White, powdery residue |
| Wiring inspection | Frayed or cracked insulation |
| Circuit overloads | Tripped breaker or flickering lights |
| Regular testing | Consistent power flow |
Frequently Asked Questions
Can Salt Bridges Be Used in All Types of Batteries?
Salt bridges can’t be used in all types of batteries because electrolyte compatibility varies. You need to guarantee the salt bridge material doesn’t react adversely with your battery’s electrolyte, which could compromise safety and performance. When properly used, salt bridges can enhance battery longevity by maintaining ionic balance. However, in some batteries, alternative solutions are better suited. Always check your battery’s specifications before adding or modifying components like salt bridges.
How Long Does a Salt Bridge or Mush Fix Typically Last?
A salt bridge or mush fix typically lasts several months to a year, depending on electrolyte stability and usage conditions. You should expect their repair longevity to vary with factors like temperature, battery load, and maintenance practices. Regular inspection helps guarantee ideal performance, and replacing them when signs of deterioration appear keeps your battery functioning smoothly. Ultimately, their lifespan hinges on maintaining proper electrolyte balance and minimizing stress on the system.
Are There Specific Brands or Materials Recommended for Repairs?
You should look for reputable battery repair kits that include corrosion inhibitors, as they offer reliable solutions for salt bridge and mush fixes. Brands like Battery Tender or NOCO are popular choices, providing quality materials designed for durability. Using these kits helps prevent future corrosion and extends repair longevity. Always follow the manufacturer’s instructions carefully to guarantee safe and effective repairs, maximizing your battery’s lifespan.
What Are Signs That a Salt Bridge Repair Has Failed?
You’ll know a salt bridge repair has failed if you notice electrolyte leakage or corrosion signs around the repaired area. These issues indicate the repair isn’t maintaining proper ionic balance, leading to potential system failure. Keep an eye out for bubbling, crusting, or discoloration, which are clear signs that the repair isn’t holding up. Address these problems promptly to prevent further damage and make sure your system operates safely.
How Often Should Battery Inspections and Repairs Be Performed?
Did you know that regular battery inspections can extend their lifespan by up to 50%? You should perform inspections every 3 to 6 months, depending on your usage and environment. This inspection schedule helps identify issues early, reducing repair frequency and preventing unexpected failures. Regular checks include examining terminals, fluid levels, and connections, ensuring your battery remains safe and reliable. Consistent maintenance saves you time and money in the long run.
Conclusion
Remember, safety always comes first when working on batteries. While repairs like salt bridges and mush fixes might seem tricky, following proper steps and precautions makes them manageable. Don’t let fear hold you back—these fixes are safe if you stay cautious and use the right gear. With a little care, you can restore your battery’s performance and prevent future issues. Trust in your skills, and always prioritize safety to keep your repair successful.