
After installing new plumbing fixtures, it’s essential to flush the system to remove debris and air pockets, ensuring smooth water flow and preventing future clogs. Start by turning off the main water supply, open the highest fixtures to release trapped air, and slowly open the main valve to allow clean water to flow through all pipes. Let the water run for a few minutes, and check for any irregularities. Keep going to discover more detailed steps and tips.
Key Takeaways
- Post-install flushing clears debris, air pockets, and leftover materials to prevent future clogs and ensure smooth water flow.
- Turning off the water supply and opening fixtures beforehand helps release trapped air and drain pipes effectively.
- Running water through the system for several minutes ensures thorough cleaning and dislodges any debris.
- Inspecting fixtures and water flow after flushing confirms proper operation and identifies potential issues early.
- Proper flushing extends plumbing lifespan, reduces repair costs, and maintains system efficiency over time.

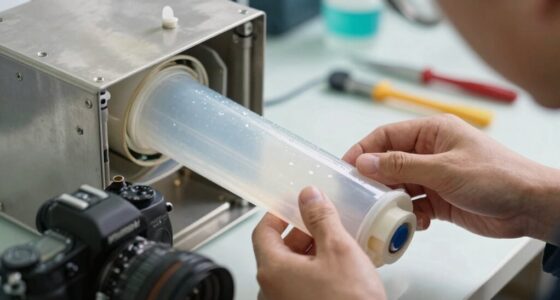
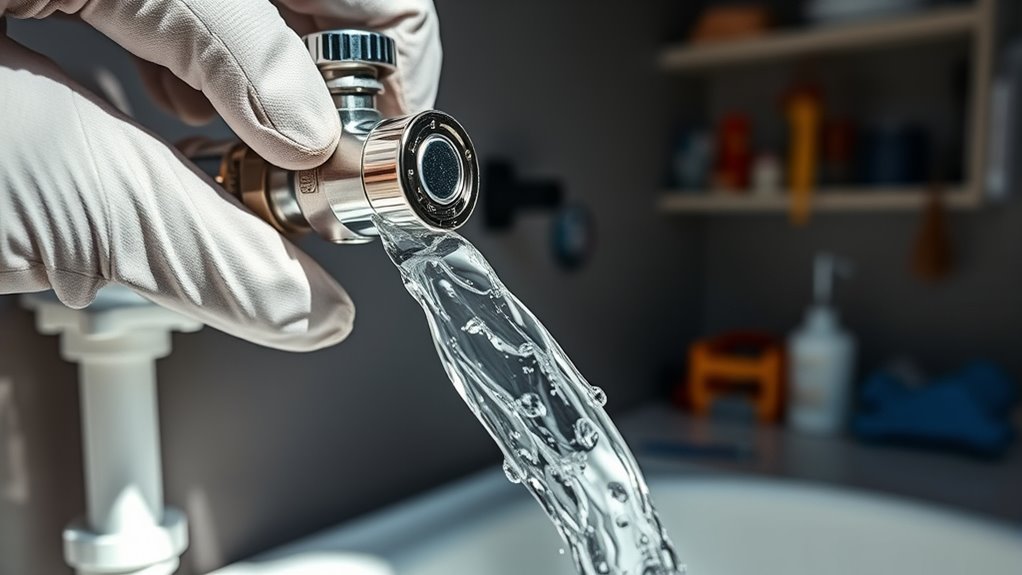
After installing new plumbing or fixtures, performing a post-install flushing is essential to guarantee everything functions properly. This step ensures that any debris, air pockets, or leftover materials from installation are cleared out, preventing future problems like clogs or water flow issues. By doing so, you’re supporting proper system maintenance, which is fundamental for the longevity and efficiency of your plumbing setup. Skipping this process can lead to buildup, pressure irregularities, or even damage to new fixtures, so it’s a critical part of following plumbing best practices.
To begin, turn off the water supply before starting the flushing process. This prevents any accidental overflows or pressure buildups. Once shut off, open the highest fixtures in your system—such as faucets or showerheads—to release trapped air and allow water to drain from the pipes. Next, open the main valve slowly to let water flow through the entire system. This steady flow helps dislodge any debris or sediment that might have been introduced during installation. It’s important to let the water run long enough—usually several minutes—to ensure the pipes are thoroughly cleared.
While flushing, keep an eye out for any irregularities like strange noises, inconsistent water pressure, or debris coming out of fixtures. These signs indicate that some blockages or leftover materials may still be present, and you might need to repeat the process or inspect specific sections. Be sure to check all new fixtures, including toilets, sinks, and appliances, to verify they’re functioning correctly and free of obstructions. This proactive approach not only saves you headaches later but also aligns with good system maintenance habits, helping you catch potential issues early.

Wayona AC Flush Kit – Air Conditioner System Flush Kit Automotive Pipeline Cleaning Tool Set with Canister, 220PSI Gauge, Fittings & Hose AC System Flush Tool for R134a R12 R22(Without Flush Solvent)
【Full AC Flush Kit】:Our AC Flush Kit is a complete set designed to meet all your air conditioning…
As an affiliate, we earn on qualifying purchases.
As an affiliate, we earn on qualifying purchases.
Frequently Asked Questions
How Often Should Post-Install Flushing Be Performed?
You should perform post-install flushing according to the installation protocols and maintenance schedules recommended by the manufacturer. Typically, it’s best to do it after installation and periodically afterward, such as every 6 to 12 months, to guarantee system cleanliness and peak performance. Regular flushing helps prevent buildup and ensures your system stays efficient, so stay consistent with these procedures to avoid future issues and maintain system integrity.
What Are the Signs Indicating a Need for Flushing?
You should consider flushing if you notice reduced water flow, strange odors, or discoloration, which indicate chemical buildup or sediment accumulation. Also, if your system’s performance drops or you hear unusual noises, it’s a sign you need to flush. These issues suggest that debris or buildup is obstructing your system, and flushing helps remove these blockages, ensuring peak function and preventing potential damage.
Can Improper Flushing Damage the Plumbing System?
Think of improper flushing as silent erosion, gradually weakening your plumbing’s foundation. If neglected, it can cause plumbing corrosion and accelerate pipe degradation, leading to leaks or costly repairs. You might not see the damage immediately, but over time, corrosion eats away at your system’s health. Regular flushing helps remove debris, preventing buildup that worsens corrosion and prolongs the lifespan of your pipes, keeping your plumbing strong and reliable.
Are There Eco-Friendly Flushing Options Available?
Yes, eco-friendly flushing options are available. You can use biodegradable cleaners that break down naturally, reducing environmental impact. Installing water-saving devices, like low-flow toilets and faucets, helps conserve water during the flushing process. These options guarantee your plumbing remains eco-conscious while maintaining efficiency. By choosing biodegradable products and water-saving devices, you support sustainability without compromising your plumbing’s performance.
Is Professional Help Necessary for Post-Install Flushing?
You don’t always need a professional for post-install flushing, but it’s wise to be cautious. DIY tips can save money, but beware of common mistakes like neglecting thorough flushing or using incompatible cleaners, which could cause damage. If you’re unfamiliar with plumbing, hiring an expert guarantees the job gets done right the first time, preventing costly repairs later. Remember, proper flushing keeps your system running smoothly—treat it like a mini emergency!

Vorhixa 6 Pcs Plumbing Tools Kit with Angle Stop Wrench & 1/2-Inch Compression Sleeve Puller, Professional Plumbers Wrench, Sandpaper and Storage Bag for Frozen/Corroded Angle Stop
All-in-One Angle Stop Valve Kit: Quickly replace compression angle stops and remove compression rings with step-by-step instructions, designed…
As an affiliate, we earn on qualifying purchases.
As an affiliate, we earn on qualifying purchases.
Conclusion
Think of post-install flushing like giving your plumbing a fresh start—it’s essential for keeping everything flowing smoothly. Skipping this step is like ignoring a warning sign on your car; it can lead to problems down the road. By taking a few minutes to flush after installation, you make sure your system runs efficiently and lasts longer. Don’t overlook this simple step—it’s the key to a trouble-free, well-functioning setup, just like a well-oiled machine.

MEASUREMAN Air Over Water Test Kit, 2” Dial, 0-300 PSI, 1/4” NPT Top Mount with 3/4” Female Hose Connection for Leak Detection and Pressure Testing
"Accurate Pressure Testing and Leak Detection Designed for precise pressure monitoring, the 2” dial gauge provides a clear…
As an affiliate, we earn on qualifying purchases.
As an affiliate, we earn on qualifying purchases.
DR.PEN Flexible Grabber Claw Pick Up Reacher Tool (Drain Clog Remove Tool), With 4 Claws Bendable Hose Pickup Reaching Assist Tool for Litter Pick, Home and Kitchen Sink, Drains, Toilet (35.4 inch)
Extremely Slender. The diameter of tube ONLY 1.1cm. Our Grabber Tool is perfect for picking up small items…
As an affiliate, we earn on qualifying purchases.
As an affiliate, we earn on qualifying purchases.