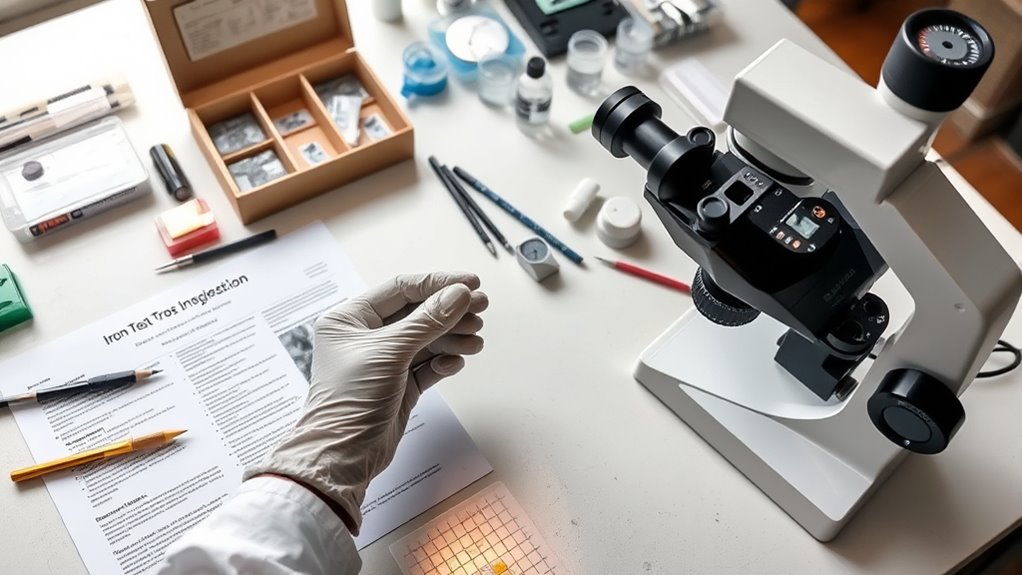
To master iron tests at home in a weekend, start by gathering a reliable testing kit, including lancets and test strips, and prepare a clean, organized workspace. Learn the different types of tests like serum iron, ferritin, and TIBC to understand what each measures. Follow step-by-step instructions carefully for blood collection and testing, then interpret your results accurately. Consistent practice and safety precautions will boost your confidence—keep exploring to gain deeper insights.
Key Takeaways
- Gather reliable home iron testing kits, including lancets, test strips, alcohol wipes, and sterile gauze for accurate sampling.
- Prepare a clean, organized workspace free of clutter, distractions, and ensure proper hygiene before beginning testing.
- Follow step-by-step instructions carefully: disinfect, collect blood sample correctly, and handle reagents precisely for reliable results.
- Learn to interpret key indicators like ferritin, transferrin saturation, and hemoglobin levels to understand your iron status effectively.
- Troubleshoot common issues, avoid recent iron-rich meals before testing, and plan follow-up actions based on your results for optimal health management.
Understanding the Importance of Iron Testing

Understanding the importance of iron testing is essential because iron levels directly impact your energy, focus, and overall health. Iron deficiency is a common issue that can lead to fatigue, weakness, and impaired blood health. Without enough iron, your body struggles to produce healthy red blood cells, which carry oxygen throughout your system. This can cause dizziness, difficulty concentrating, and a general sense of tiredness. Regular iron testing helps you identify deficiencies early, so you can take steps to restore your iron levels before more serious health problems develop. Knowing your iron status empowers you to make informed decisions about your diet, supplements, and lifestyle, ensuring your blood health stays ideal and your energy remains high. Monitoring your Iron Levels can also help prevent the development of more severe health issues related to anemia.
Gathering the Necessary Supplies and Equipment
To successfully perform iron tests at home, you’ll need to gather the right supplies and equipment. These tools help you accurately assess iron deficiency and determine if nutritional supplements are necessary. First, obtain a reliable home testing kit designed for iron levels—these kits often include test strips and lancets. Second, have alcohol swabs and sterile gauze on hand to ensure cleanliness during sample collection. Lastly, keep a notebook or app ready for recording your results and tracking any changes in your iron levels over time. Investing in quality supplies ensures accurate readings and helps you make informed decisions about managing iron deficiency. Proper test accuracy is essential for effective monitoring. With the right tools, you’ll be well-equipped to monitor your iron status confidently from home.
Preparing Your Workspace for Accurate Results

Make certain your testing area is clear of clutter to prevent any mix-ups or contamination. Minimize distractions around you so you can focus and follow each step carefully. A tidy, quiet space helps ensure your results are accurate and reliable. Incorporating calming sound therapy into your environment can further support a focused mindset during testing.
Clear Testing Area
Before you begin your iron test, make sure your workspace is clean and free of distractions. A clear testing area helps guarantee accurate results and keeps you focused. Start by tidying up your space to create a clean workspace, removing unnecessary items that could interfere. Keep your tools organized so you can quickly access what you need without searching. An organized setup reduces errors and makes the process smoother. Additionally, ensuring proper filtration of your materials can prevent issues during testing. A tidy, organized environment minimizes mistakes and helps you concentrate on the test, giving you confidence in your results.
Minimize Distractions
Minimizing distractions is essential for achieving accurate iron test results. When your environment is free of interruptions, you can focus better and ensure the test is conducted properly. Reduce distractions by turning off notifications, silencing your phone, and closing unrelated tabs or devices. Clear your workspace of clutter so your attention remains on the testing process. A distraction-free zone enhances focus, helping you follow each step carefully. Avoid background noise and interruptions that can break your concentration. By creating a calm, quiet setting, you improve distraction reduction and focus enhancement. This careful preparation ensures your results are accurate and reliable, giving you confidence in your home testing process. Keep your workspace simple, quiet, and free from interruptions for the best possible outcome. Incorporating a calm environment can significantly improve your concentration and the precision of your results.
Learning the Different Types of Iron Tests
Understanding the different types of iron tests is vital for accurately evaluating your iron levels at home. Each test offers unique insights into your blood sample and overall iron status, impacting test accuracy. Knowing which test to use helps you interpret results correctly and track improvements effectively. For example, water-based health benefits from aquatic exercise can support your overall well-being while monitoring your iron levels.
- Serum Iron Test: Measures the amount of circulating iron in your blood, providing quick insights.
- Total Iron Binding Capacity (TIBC): Assesses your blood’s capacity to bind and transport iron, indicating iron deficiency or overload.
- Ferritin Test: Checks stored iron levels, essential for diagnosing anemia and determining your iron reserves.
Familiarize yourself with these tests to choose the right one for your needs and ensure reliable results during your at-home assessment.
Properly Collecting Blood Samples at Home
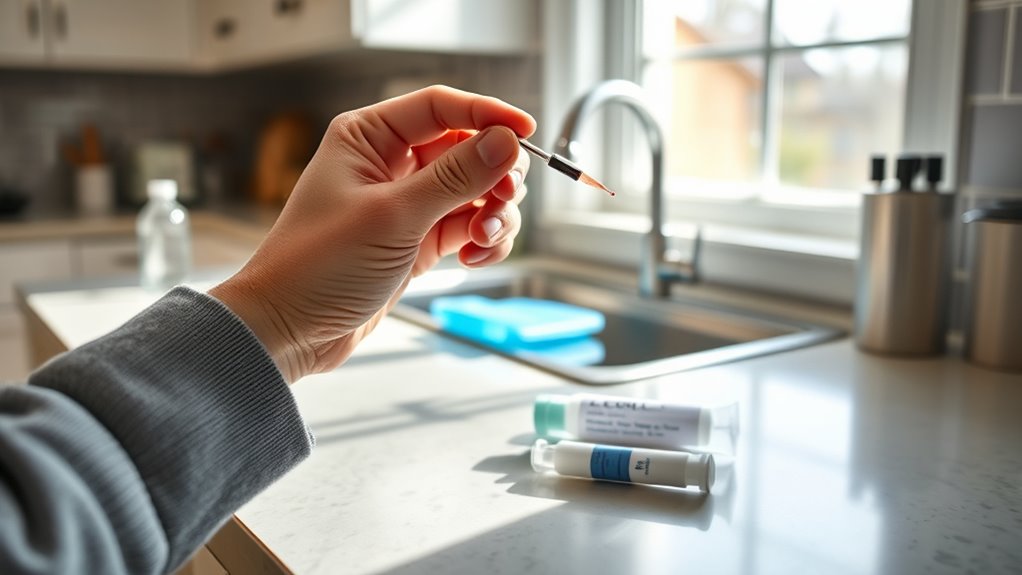
Before you start, gather all your equipment to guarantee a smooth process. Follow the collection steps carefully to get an accurate sample. Proper preparation and technique are key to reliable iron test results at home. Ensuring the quality of your sample is essential for accurate diagnosis and effective monitoring.
Prepare Your Equipment
To guarantee accurate results, you need to gather your equipment carefully before collecting blood samples at home. Proper preparation ensures your sample accurately reflects your iron levels, which impacts vitamin absorption and dietary iron intake. Start by assembling clean, sterile tools to avoid contamination. Ensure you have:
- Sterile lancets for painless finger pricks
- Alcohol wipes to disinfect the area
- Proper collection tubes or containers for blood storage
Using the right equipment helps prevent errors and guarantees your sample’s integrity. Make sure everything is within reach and ready to use. Accurate collection minimizes the risk of hemolysis or contamination, which could skew your iron test results. Proper handling of samples also involves understanding the headphone jacks and compatible devices to ensure your equipment functions correctly. Preparing thoroughly provides confidence that your at-home test will be both effective and reliable.
Follow Collection Steps
Once you’re ready with your equipment, carefully follow each step to collect your blood sample accurately. Proper collection is key to understanding your iron levels and preventing iron deficiency. Make sure your hands are clean, and follow the instructions precisely. Gently squeeze your finger to produce a droplet of blood, then carefully collect it with the provided container or swab. Avoid smearing or touching the sample to ensure accurate results. Remember, maintaining adequate dietary iron is essential for healthy blood, so regular testing helps monitor your iron status. Ensuring proper sample collection techniques is crucial for reliable testing outcomes. Here’s a quick emotional reminder:
| Hope for health | Take control | Prevent deficiency |
|---|---|---|
| Your blood test | Empowers you | Protects your future |
Performing the Test Step-by-Step
Performing the test step-by-step is straightforward if you follow the proper procedures. First, confirm your blood sample is collected correctly, avoiding contamination or spills. This sample will help detect iron deficiency accurately. Next, prepare your testing kit as instructed, keeping everything sterile. Carefully follow each step, such as adding reagents or waiting specific times, to get an accurate reading. Be precise with measurements and timing to ensure reliable results. Remember that understanding personalized care can help you better interpret your test outcomes and manage your health proactively.
Interpreting Your Test Results Correctly

Understanding your test results is essential for evaluating your iron levels accurately. When reviewing your blood testing, look for key indicators like serum ferritin, transferrin saturation, and hemoglobin. Low ferritin often signals iron deficiency, even before symptoms appear. Transferrin saturation below normal suggests your body isn’t storing enough iron, while hemoglobin levels reveal if anemia has set in. It’s important to interpret these results in context; a single abnormal value might not indicate a serious issue, but consistent patterns do. Keep in mind that factors like recent blood loss or inflammation can influence results. If your numbers point toward iron deficiency, consult a healthcare professional for guidance. Correct interpretation helps you understand your status and decide whether dietary changes or supplements are necessary.
Troubleshooting Common Issues During Testing
While reviewing your test results is important, you might encounter some common issues that can affect testing accuracy. For example, improper sample collection or not following instructions can lead to unreliable results. Dietary considerations, like recent iron-rich meals, may skew your readings, so plan your test accordingly. Emotional support plays a role too—stress or anxiety can impact your focus and sample quality. Here are some troubleshooting tips:
- Ensure you’re following the test kit instructions carefully to avoid contamination or incorrect sampling.
- Avoid eating or drinking iron-rich foods before testing to prevent skewed results.
- Seek emotional support if you’re feeling anxious, as calmness helps improve sample quality.
Addressing these issues helps guarantee more accurate and reliable test outcomes.
Maintaining Safety and Hygiene Throughout the Process

To keep yourself safe and hygienic during iron testing, always wear personal protective equipment like gloves and safety glasses. Make sure to sanitize your testing materials before use and dispose of waste properly afterward. Following these steps helps prevent contamination and ensures a safe testing environment.
Use Personal Protective Equipment
Using personal protective equipment (PPE) is essential to keep yourself safe and maintain hygiene during iron testing at home. PPE helps protect against accidental spills and ensures blood safety, preventing contamination. Always wear gloves to avoid direct contact with blood or samples, reducing infection risk. Use a lab coat or apron to shield your clothing and skin from potential splashes. Additionally, safety goggles or glasses safeguard your eyes from splashes or debris. Remember, proper PPE use minimizes hazards and keeps the environment clean. Keep PPE accessible and dispose of used items properly after each test to maintain hygiene standards. Prioritizing personal safety with the right PPE makes your testing process safer and more efficient.
Sterilize Testing Materials
After putting on your personal protective equipment, the next step is to sanitize all testing materials to prevent contamination. Sanitizing testing materials ensures that no bacteria, dirt, or residue interfere with your results. Use appropriate methods such as boiling tools for at least five minutes, wiping surfaces with alcohol wipes, or using a sterilizing solution. Make sure to thoroughly clean items like test tubes, pipettes, and spatulas before use. Proper sterilization not only maintains hygiene but also guarantees the accuracy of your iron test results. Avoid shortcuts like reusing unsterilized tools, as contamination can lead to false readings. Taking these steps helps you keep your process safe and reliable, ensuring your home iron testing is both effective and hygienic.
Proper Waste Disposal
Since improper waste disposal can pose health risks and compromise hygiene, it’s essential to handle all testing materials responsibly. Proper waste disposal minimizes exposure to potentially contaminated materials and reduces the environmental impact. After completing your iron tests, ensure all used materials, like test strips and gloves, are sealed in a leak-proof container. Never dispose of testing materials in regular trash or down the drain. Instead, follow local regulations for hazardous waste. Proper waste disposal not only keeps your space clean but also protects the environment. To stay safe and eco-friendly, consider these tips:
- Seal used materials in a designated waste bag before disposal
- Avoid flushing testing waste down the toilet
- Follow local guidelines for hazardous waste disposal
Planning Follow-Up Actions Based on Your Results

Once you have your iron test results, it’s essential to interpret them carefully to determine the next steps. If your levels are low, focus on nutrition tips like iron-rich foods and consider lifestyle changes such as reducing coffee intake that can hinder absorption. If your levels are high, you may need to limit iron supplements or adjust your diet accordingly. Use this table to guide your actions:
| Result | Recommended Action | Key Focus |
|---|---|---|
| Low Iron | Increase iron-rich foods & supplements | Nutrition & lifestyle adjustments |
| Normal Iron | Maintain current habits | Prevention |
| High Iron | Consult healthcare provider | Monitoring & diet management |
Planning follow-up actions helps you address issues promptly and effectively.
Frequently Asked Questions
Can I Perform Iron Tests on Children at Home?
You can perform pediatric iron testing at home to help identify potential child iron deficiency, but it’s not recommended without professional guidance. While some home test kits exist, they may not be as accurate as lab tests. For reliable results, consult your child’s healthcare provider. They can recommend proper pediatric iron testing and interpret results, ensuring your child’s health is accurately assessed and any deficiency is properly addressed.
How Often Should I Repeat Iron Testing at Home?
Don’t put all your eggs in one basket; your testing frequency should balance accuracy with practicality. Usually, you should repeat iron testing every 3 to 6 months to ensure reliable results. Following frequency guidelines helps maintain test accuracy and track your iron levels effectively. Regular testing allows you to catch any issues early and adjust your diet or supplements as needed, keeping your health on the right track.
Are There Specific Brands of Home Iron Test Kits Recommended?
You should look for reputable brands like Everlywell or LetsGetChecked, known for their home test accuracy and affordability. These kits provide reliable results without breaking the bank, making them a smart choice for regular monitoring. Always check reviews and verify the kit is certified by relevant health authorities. Choosing a trusted brand helps you get accurate iron level insights conveniently at home, saving you time and money.
What Are the Signs Indicating a Need for Immediate Medical Consultation?
If you notice iron deficiency symptoms like extreme fatigue, dizziness, or pale skin, seek medical help promptly. Emergency warning signs include chest pain, shortness of breath, or rapid heartbeat. Don’t ignore these signals—consult a healthcare professional immediately to prevent complications. Recognizing these signs guarantees you get the treatment you need without delay, helping you stay safe and healthy.
How Do I Store and Dispose of Used Testing Materials Safely?
You should store used testing materials in a sealed, puncture-proof container to guarantee safe storage and prevent leaks. Follow disposal guidelines by disposing of the container at designated sharps or biomedical waste disposal sites. Keep testing supplies out of reach of children and pets. Always wash your hands thoroughly after handling used materials. Proper storage safety and disposal guidelines help prevent contamination and ensure you handle test waste responsibly.
Conclusion
Mastering iron tests at home isn’t just about checking a box; it’s about taking control of your health. With the right knowledge and preparation, you can uncover crucial insights into your iron levels—your body’s silent storyteller. Think of it as revealing a secret message from your blood, guiding you toward better wellness. So, embrace the process confidently, because understanding your iron status empowers you to make informed health decisions—your health’s true masterpiece.