To plumb a whole house reverse osmosis system, start by locating your main water line and turning off the supply. Connect the system to this line using durable, food-grade piping, and install shut-off valves for easy maintenance. Make certain your water pressure is within the recommended range (40-60 psi), adding a regulator if needed. Secure all fittings tightly to prevent leaks, and connect the drain line properly. For detailed steps, you’ll discover more helpful tips ahead.
Key Takeaways
- Connect the system to the main water line using durable, food-grade piping at an optimal point for efficiency.
- Install shut-off valves and pressure gauges to monitor and control water flow and pressure levels.
- Ensure water pressure is within the recommended range, adding regulators if necessary to prevent membrane damage.
- Run the drain line securely to a proper drain, following local plumbing codes for wastewater disposal.
- Regularly inspect and maintain fittings, filters, and membranes for leaks and optimal system performance.

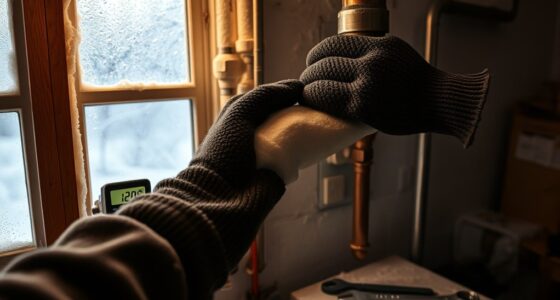
Installing a whole house reverse osmosis (RO) system can substantially improve your home’s water quality, but the plumbing process requires careful planning and precise execution. One of the first things you need to consider is how the system will integrate with your existing plumbing. You’ll want to identify the main water line coming into your house and determine the best point to connect your RO system. It’s essential to ensure your home’s water pressure is sufficient to support the system’s operation; inadequate pressure can reduce filtration effectiveness and strain your equipment. If your water pressure is low, you might need a booster pump to maintain optimal flow and performance.
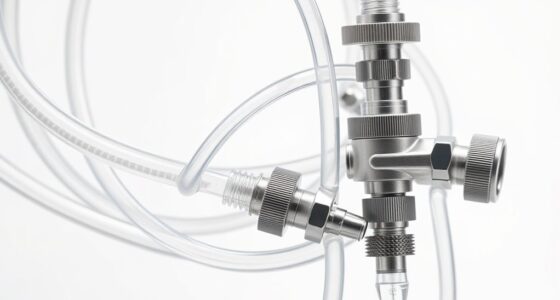
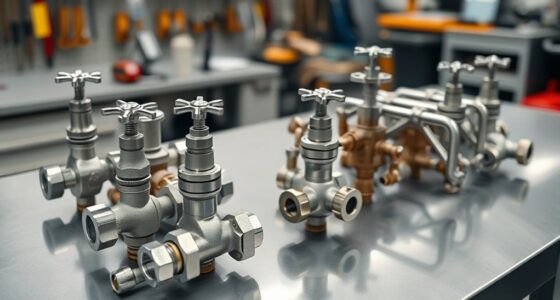
Once you’ve established where to connect, you’ll run new plumbing lines from the main water source to the RO unit. Use durable, food-grade piping to prevent leaks and contamination. When installing the filtration system, it’s crucial to install pressure gauges and shut-off valves. These components will help you monitor water pressure and isolate the system during maintenance or repairs. Properly securing fittings and ensuring tight seals will prevent leaks, which are common issues if connections aren’t correctly made.
Use food-grade piping, install pressure gauges and shut-off valves, and ensure tight fittings to prevent leaks during RO system setup.
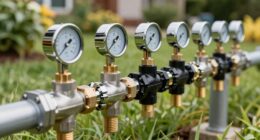
Water pressure plays a significant role in system efficiency. Too high, and it can damage the membranes; too low, and it hampers filtration. Ideally, you want your water pressure to be within the manufacturer’s recommended range, often around 40-60 psi. If your pressure isn’t within this range, installing a pressure regulator can help maintain consistent flow and protect your membranes from damage. Regular system maintenance is essential for long-term performance. This includes replacing filters and membranes as recommended by the manufacturer, checking for leaks, and cleaning components to prevent buildup. Maintaining proper system pressure through regular checks ensures your RO system functions effectively and prolongs its lifespan.
During installation, you should also consider the drainage for wastewater produced during the filtration process. Connecting a drain line securely to a suitable drain allows the system to dispose of excess water safely. Remember to follow local plumbing codes and manufacturer instructions closely to avoid issues later on.
Finally, after completing the installation, test your entire system thoroughly. Check for leaks around fittings and ensure water flows smoothly through the filters. Keep a close eye on water pressure readings and be prepared to adjust as needed. Regular maintenance, including cleaning filters and inspecting connections, will keep your whole house reverse osmosis system operating efficiently, providing you with clean, high-quality water for years to come.
Frequently Asked Questions
What Is the Average Lifespan of a Whole House Reverse Osmosis System?
A whole house reverse osmosis system typically lasts 10 to 15 years with proper maintenance. To extend its lifespan, follow regular maintenance tips like replacing filters and inspecting components. Keep an eye on system performance and consider system upgrades when necessary to guarantee peak filtration. Proper upkeep not only prolongs the system’s life but also maintains clean, high-quality water for your entire household.
How Often Should I Replace the Reverse Osmosis Membrane?
You should replace the reverse osmosis membrane every 2 to 3 years, depending on your maintenance schedule and water quality. Regularly monitor your system’s performance; if you notice reduced water flow or taste issues, it’s a sign it’s time for a replacement. Following the recommended replacement frequency guarantees maximum filtration, prevents buildup, and maintains your system’s efficiency. Keep track of your maintenance schedule to avoid unnecessary delays.
Can I Install the System Myself or Need a Professional?
You can definitely try a DIY installation if you’re comfortable with plumbing, but keep in mind that a whole house reverse osmosis system can be complex. If you’re unsure or want to guarantee everything’s done correctly, it’s best to seek professional assistance. A professional installer guarantees proper setup, minimizes leaks, and ensures your system functions efficiently. Weigh your experience level before attempting a DIY, and don’t hesitate to get expert help if needed.
What Are the Signs Indicating My System Needs Maintenance?
You might notice a change in your water taste or a decrease in water flow, which are signs your system needs maintenance. Coincidentally, these issues often happen around the time you should replace filters. If your water looks cloudy or has a strange smell, it’s time for a filter replacement. Keep an eye on these signs to guarantee your reverse osmosis system keeps working effectively and provides clean, great-tasting water.
Is a Booster Pump Necessary for Optimal Performance?
A booster pump isn’t always necessary, but it can substantially improve your system performance if your water pressure is low. When the pressure drops below the recommended level, a booster pump helps maintain consistent flow and filtration efficiency. Without it, your reverse osmosis system may struggle to produce enough purified water, leading to longer wait times and reduced effectiveness. Consider installing one if you notice low pressure or slow water flow.
Conclusion
By properly plumbing your whole house reverse osmosis system, you guarantee clean, safe water for everyone. Remember, a typical RO system can remove up to 99% of contaminants, providing 75 gallons of purified water daily for a household of four. This shows how a well-installed system can markedly improve your home’s water quality, giving you peace of mind and better health. Take your time with installation, and enjoy the benefits of pure, fresh water every day.