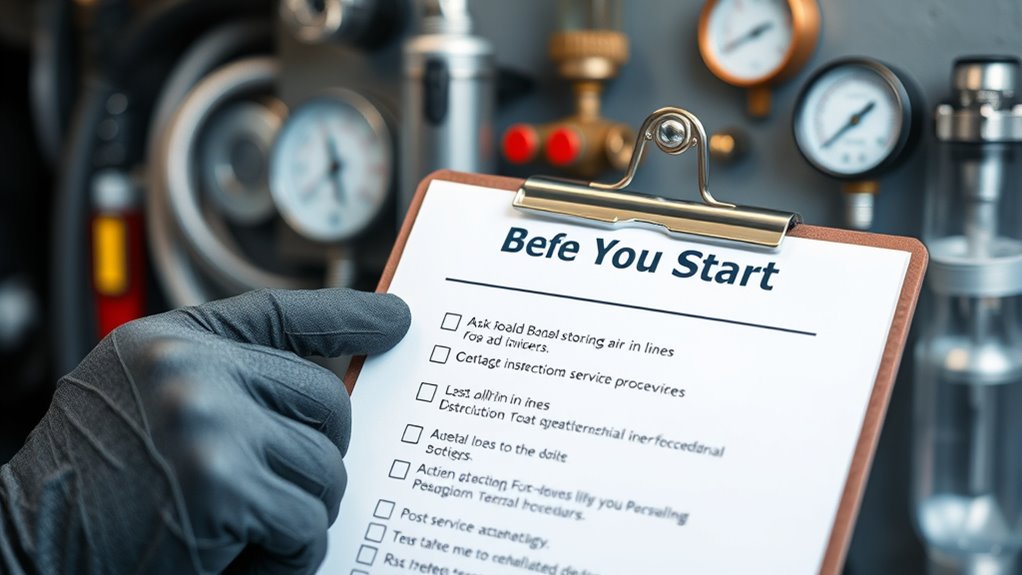
Before you start, make certain all air has been properly removed from the lines after service. First, locate and open the bleed valves at high points or near critical components, allowing trapped air to escape safely. Check for leaks and tight connections, then monitor pressure gauges for stability. Run the system briefly and verify smooth operation. If you continue, you’ll discover step-by-step procedures to guarantee a thorough purge and ideal system performance.
Key Takeaways
- Ensure the system is fully depressurized before opening bleed valves or disconnecting lines.
- Locate and inspect bleed valves for accessibility, proper condition, and safety compliance.
- Open bleed valves slowly and monitor for air or fluid escaping, closing once a steady flow is achieved.
- Recheck all fittings and connections for tightness and signs of leaks after purging.
- Run the system briefly to confirm smooth operation and verify no residual air remains in lines.

Express Water 3-Stage Whole House Water Filter System, Reduces Heavy Metals, Scale, Chloramine, Chlorine, PFAs, Lead & Arsenic, Free-standing Stainless Steel Frame & 3 Pressure Gauges
WHOLE HOUSE WATER FILTRATION: Notice the difference immediately with 3-stage water filtration process throughout your home. From every...
As an affiliate, we earn on qualifying purchases.
Post-Service Air Line Purging Procedures

After completing service on your air lines, it’s vital to guarantee there’s no residual air trapped in the system that could affect performance. Trapped air can cause inconsistent pressure, reduce efficiency, or even damage components over time. To prevent these issues, you need to perform a proper system purge and use the bleed valve effectively. Start by inspecting the bleed valve, which is typically located at high points in the system or near critical components. This valve allows you to release any trapped air safely. Before opening the bleed valve, ensure the system is depressurized to avoid sudden bursts of air or fluid. Once depressurized, slowly open the bleed valve to allow air to escape. You should see or hear air escaping; keep the valve open until a steady flow of fluid or air comes out without interruption. This process helps to eliminate any pockets of air that might be lingering in the lines.
Next, you’ll want to perform a complete system purge. This involves running the system with a controlled flow of fluid or compressed air to push out any remaining air pockets. If your setup includes a dedicated purge port or valve, connect it as per the manufacturer’s instructions. Engage the purge process gradually—start at a low flow rate and increase slowly. Keep an eye on pressure gauges and listen for irregular sounds that could indicate trapped air or turbulence. During this step, it’s imperative to monitor the system continuously. If you notice pressure drops or inconsistent operation, it could be a sign that air is still present or that there’s a leak somewhere.
Additionally, using the appropriate home theatre projector can help you visually verify the system’s performance and ensure no trapped air is affecting image quality. After the initial purge, close the bleed valve carefully, ensuring no residual air remains. You might need to repeat the purge process a couple of times if the system is large or complex. Once you’re confident the system is free of air, recheck all fittings and connections for tightness. Leaks or loose fittings can introduce new air into the system, undermining your efforts. It’s also wise to double-check pressure readings and run the system briefly to confirm stable operation. Taking these steps diligently helps guarantee your air lines run smoothly and efficiently after service. With a proper system purge and careful use of the bleed valve, you minimize the risk of future issues caused by trapped air, protecting your equipment and maintaining peak performance.

iSpring Whole House Water Filter System, Reduces Iron, Manganese, Chlorine, Sediment, Taste, and Odor, 3-Stage Iron Filter Whole House, Model: WGB32BM
Whole house water filter that protect your family and household appliance from iron, manganese and more: Our 3rd...
As an affiliate, we earn on qualifying purchases.
Frequently Asked Questions
How Can I Tell if Air Is Still in the Lines After Purging?
You can tell if air is still in the lines after purging by checking the pressure gauge for fluctuations or instability. Perform a visual inspection of the lines for bubbles or pulsations, which indicate air presence. If the pressure readings are inconsistent or you see visible bubbles, there’s still air in the lines. Aim for steady pressure and no visible bubbles to guarantee all air has been successfully cleared.
What Are the Common Signs of Incomplete Air Purging?
If you’re still feeling like something’s fishy, incomplete air purging might be the culprit. Common signs include fluctuating air pressure and inconsistent flow rate, which indicate trapped air. You may also notice sputtering or uneven operation. When these issues crop up, it’s a clear sign you need to double-check the lines, as air pockets prevent smooth flow, turning your system into a wild ride instead of a well-oiled machine.
How Long Should I Wait Before Testing for Air in Lines?
You should wait at least 15 to 30 minutes after completing line maintenance before conducting air pressure testing for air in lines. This allows any residual air or moisture to settle, ensuring accurate results. During this period, monitor the system carefully. Rushing testing too soon can lead to false readings or damage. Patience is key to confirming the lines are free of air and ready for safe operation.
Are Special Tools Needed for Post-Service Air Line Purging?
You don’t need special tools for post-service air line purging, but having the right equipment makes all the difference. Using standard tools like a wrench or a compressor, you can effectively clear air from the lines. Don’t put the cart before the horse—ensure you follow proper procedures to avoid issues later. Proper air line purging keeps your system running smoothly and prevents costly repairs down the line.
What Safety Precautions Should I Follow During Purging Procedures?
You should wear personal protective equipment like gloves and safety goggles during purging procedures to safeguard against potential hazards. Always follow emergency shutdown procedures if you notice leaks, unusual noises, or pressure issues. Confirm the workspace is clear of unnecessary personnel, and double-check that all safety devices are in place. Staying vigilant and prepared helps prevent accidents and ensures a safe, efficient purging process.

HQUA WF3-01 3-Stage Whole House Water Filtration System, Reduces Heavy Metals (Lead, Mercury, Copper, Nickel, Chromium), Chloramine, Sediment, Odor, and VOC’s
【 Improve Water Taste 】 – Sediment Filter and Carbon Block Filter reduce dirt, rust, sand, silt, and...
As an affiliate, we earn on qualifying purchases.
Conclusion
Remember, taking the time to properly purge air from your lines after service is vital for safety and efficiency. Follow the checklist diligently to guarantee everything runs smoothly. As the saying goes, “A stitch in time saves nine.” By doing this now, you prevent bigger issues later, keeping your system reliable and your work hassle-free. Stay attentive, and your equipment will thank you for it.

iSpring UVF50 LED UV Water Filter System, Whole House Ultraviolet Water Purifier Filter, Long-Life LED Design, Built-in Smart Flow Sensor Switch, Mercury-Free, Up to 13.2 GPM
Durable Construction – The UV water filter provides a reliable structure with stable pressure resistance and an extended...
As an affiliate, we earn on qualifying purchases.