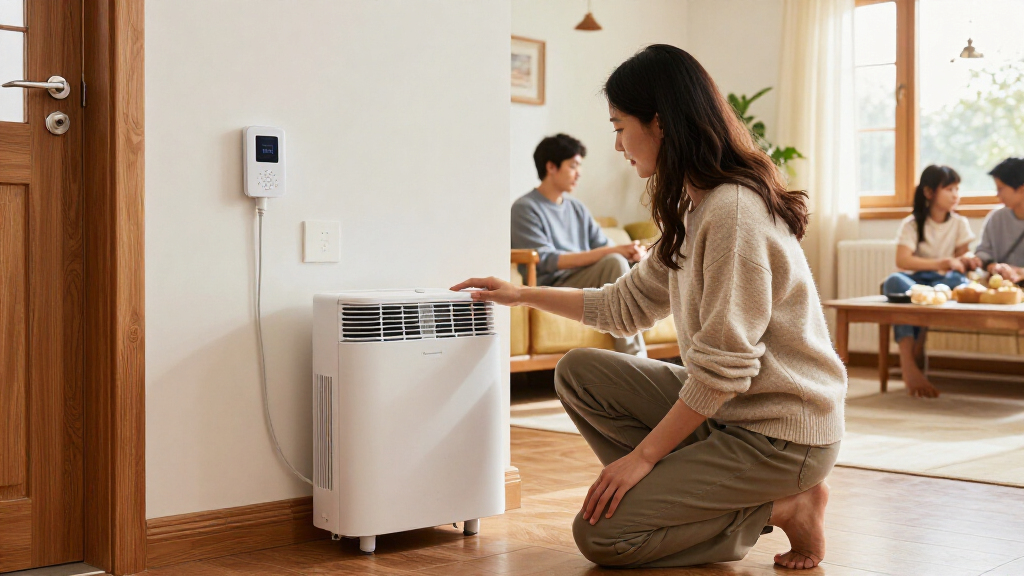
Use this guide to select and operate a whole-house humidifier that works with your home’s heating system. It is for homeowners who can read a thermostat and inspect accessible furnace or ductwork areas but may not have HVAC installation experience. You will learn how to check whether a humidifier fits your system, set a safe humidity target, and maintain it. Allow 1–2 hours to research and prepare; installation time varies by model and may require an HVAC professional.

Get home appliances delivered free with Prime
- Fast, free delivery on millions of items
- Prime Video, Amazon Music and more included
- Member-only deals all year

Levoit Superior 6000S Evaporative Humidifier, 23L (6-Gallon) Whole-House Coverage
- ✔ Coverage: Up to 3,000 sq ft
- ✔ Output: 1,500 mL/h
- ✔ Tank capacity: 23 L (6 gal)

AIRCARE Space Saver Large Evaporative Whole House 6-Gallon Humidifier
- ✔ Coverage: Up to 2,700 sq ft
- ✔ Capacity: 6 gal
- ✔ Runtime: Listed as 6 hours

AIRCARE Whole-House Console-Style Evaporative Humidifier – Canyon
- ✔ Coverage: Up to 3,700 sq ft
- ✔ Reservoir: 4.75 gal, pour-in
- ✔ Runtime: Up to 45 hours
Difficulty: Intermediate | Time: 1–2 hours for research and setup; 10–20 minutes monthly for maintenance
What You’ll Need
Tools & Materials:
- Indoor hygrometer or thermostat with a humidity reading
- Heating system and ductwork information, including furnace or air-handler model
- Humidifier manufacturer’s sizing and compatibility guidance
- Protective gloves and eye protection for inspection and maintenance
- Replacement water panel, pad, or filter specified for the selected model
Knowledge:
- Ability to identify the home’s heating system type and locate its thermostat
- Basic understanding of humidity readings and condensation
- Willingness to hire a licensed HVAC professional for electrical, plumbing, or ductwork installation
Whole-house humidifiers connect to a home’s heating and air distribution system. Bypass, fan-powered, and steam models have different requirements. Check the product manual and local code before buying. Do not open, wire, or alter a furnace unless qualified to do so.
Levoit Superior 6000S Evaporative Humidifier, 23L (6-Gallon) Whole-House Coverage
The Superior 6000S makes the strongest all-around case for whole-home use in this group. Its stated coverage reaches 3,000 square feet, and its 1,500 mL/h output is the highest clearly specified output rate among these three entries. The 23-liter tank is matched with up to 72 hours of operation on low, so households seeking fewer refill interruptions have a concrete advantage over the Space Saver, whose listed runtime is six hours.Humidity management is another point of separation. Levoit’s built-in sensor, with stated accuracy of ±5%, and automatic modes can adjust operation toward a chosen humidity level; app and voice control add convenience when the unit is placed away from the main living area. The evaporative design produces no visible mist, which can help avoid wet surfaces and the white dust associated with some other humidifier types.The compromises are ongoing wick replacement every three to six months and an unspecified noise rating. Its 3,000-square-foot claim is also below the Canyon’s 3,700-square-foot figure, so buyers prioritizing the broadest stated reach may prefer that larger console. We see the Levoit as the more balanced choice where long runtime and automated control matter more than maximum claimed coverage.
Pros:
- Stated coverage up to 3,000 square feet with 1,500 mL/h output
- 23-liter tank offers up to 72 hours on low speed
- Humidity sensing and automatic modes reduce manual adjustments
- VeSync app and voice-assistant integration
Cons:
- Filter replacement is recommended every three to six months
- No specific noise level in decibels is provided
Best for: Households seeking broad coverage, fewer refills, and app-connected humidity control in one unit.
Not ideal for: Buyers who need the highest stated coverage in this lineup or want to avoid periodic filter replacement.
Bottom line: We recommend the Superior 6000S for its strong mix of coverage, long low-speed runtime, and automatic smart control.
“We recommend the Superior 6000S for its strong mix of coverage, long low-speed runtime, and automatic smart control.”
AIRCARE Space Saver Large Evaporative Whole House 6-Gallon Humidifier
The AIRCARE Space Saver suits buyers who want a traditional evaporative console with easy-to-read digital controls and an automatic humidistat. It is rated for up to 2,700 square feet and has a six-gallon tank, placing its capacity in the same general class as the Levoit’s six-gallon reservoir. It also shuts off when the set humidity is reached or the tank runs dry, which helps limit unnecessary operation.Its practical advantage over the Levoit is mobility: casters make it easier to roll the 14-pound cabinet between rooms, and the touch controls avoid reliance on an app. That makes it a useful fit for households that want simple on-unit adjustment. Yet the stated runtime of about six hours is the clearest drawback in the lineup. It falls far short of the Levoit’s 72 hours on low and the Canyon’s 45 hours, so buyers should verify that this figure fits their planned operating conditions and be prepared for more frequent attention.The Space Saver’s 1,000-watt specification and description of potentially noisy evaporative operation are also worth considering for a unit intended to run in occupied rooms. Compared with the Canyon, it has less stated coverage but a lighter, more mobile form. We rank it third because its controls are straightforward, while its short listed runtime weakens its case as a low-maintenance whole-home solution.
Pros:
- Stated coverage up to 2,700 square feet
- Digital controls with auto humidistat
- Automatic shutoff at target humidity or when empty
- Casters support movement between rooms
Cons:
- Listed runtime is about six hours, much shorter than the other picks
- Evaporative fan operation may be noisy
- At 1,000 watts, power use is a consideration for extended operation
Best for: Buyers who prefer digital touch controls, automatic shutoff, and a console they can roll between rooms.
Not ideal for: Households that want long unattended operation or need the broadest stated coverage.
Bottom line: We would choose the Space Saver for mobile, on-unit digital control, provided its stated six-hour runtime suits the household.
“We would choose the Space Saver for mobile, on-unit digital control, provided its stated six-hour runtime suits the household.”
AIRCARE Whole-House Console-Style Evaporative Humidifier – Canyon
When the deciding factor is the broadest coverage claim in this comparison, the AIRCARE Canyon leads with a stated reach of up to 3,700 square feet. That is 700 square feet beyond the Levoit and 1,000 beyond the Space Saver on paper. Its 4.75-gallon pour-in reservoir and stated runtime of up to 45 hours give it a substantial operating window, though the Levoit’s larger tank and 72-hour low-speed figure make that model more appealing to households focused on extending time between refills.The Canyon keeps operation simple with analog controls, three fan speeds, an adjustable humidistat, and an indicator that shows when a refill is needed. Automatic shutoff when empty is a useful safeguard. In contrast with the app-connected Levoit and touch-controlled Space Saver, however, it does not offer the same digital convenience; adjustments happen at the console.Placement is the main cost of choosing this coverage-first model. At 23 by 25 by 15 inches and 26 pounds, the cabinet is notably bulky and heavier than the Space Saver, so it may be awkward in smaller rooms or for anyone who expects to move the humidifier often. Its larger coverage claim is attractive for open spaces, but home layout still affects distribution. We place it second because it offers the broadest stated reach and a solid runtime, with physical size and simpler controls as meaningful tradeoffs.
Pros:
- Broadest stated coverage in this group at up to 3,700 square feet
- 4.75-gallon reservoir with up to 45 hours of stated runtime
- Adjustable humidistat and automatic empty-tank shutoff
- Three fan speeds and a visible refill indicator
Cons:
- Large 23 × 25-inch footprint can be difficult to place
- At 26 pounds, it is less convenient to move than the Space Saver
- Analog controls lack the Levoit’s app and smart features
Best for: Households with a spacious area to humidify that can accommodate a large console and prefer simple manual controls.
Not ideal for: Buyers with limited floor space, frequent room-to-room moves, or a preference for app-based settings.
Bottom line: We recommend the Canyon when maximum stated coverage matters more than compact placement or connected controls.
“We recommend the Canyon when maximum stated coverage matters more than compact placement or connected controls.”
As an Amazon Associate we earn from qualifying purchases.
Before You Start
Measure indoor humidity for several days during heating season, and inspect windows for condensation or signs of moisture. A typical starting target is 30–40% relative humidity in cold weather, but the safe level depends on outdoor temperature, window quality, insulation, and the home. Lower the target if condensation appears. If the home has persistent dampness, visible mold, or water leaks, address those problems before adding humidity.
Confirm that the humidifier is rated for the home’s size and compatible with the heating equipment. Ask an HVAC professional to confirm airflow, drain, water supply, electrical needs, and installation location. Keep the system’s water shutoff and power disconnect accessible.
Step-by-Step Instructions
Step 1: Measure current indoor humidity
Place a hygrometer in a frequently used room, away from windows, exterior doors, kitchens, bathrooms, and direct heat vents. Record the reading in the morning and evening for several days while the heating system runs. Compare readings across rooms if the home has large temperature differences.
Tip: A single reading may not represent the whole home. Use a second hygrometer if rooms feel noticeably different.
Check: You have a short record of typical humidity and know whether the home is consistently dry during heating season.
Step 2: Check the home for moisture problems
Look for water stains, musty odors, peeling paint, damp basement areas, and mold. Check window edges for droplets or frost on cold days. Repair leaks and improve ventilation before raising indoor humidity; a humidifier cannot fix moisture intrusion.
Tip: Do not aim for a higher humidity reading when windows already collect water. Condensation can damage frames and encourage mold growth.
Check: The home has no unresolved leaks or persistent damp areas, and windows are not regularly wet.
Step 3: Choose a compatible humidifier type
Compare bypass, fan-powered, and steam models against your furnace or air handler, duct layout, home size, and maintenance capacity. Bypass and fan-powered units typically use an evaporative water panel; steam models heat water and need suitable electrical capacity. Use the manufacturer’s sizing chart, and confirm that the system can support the model.
Tip: Do not choose by square footage alone. Airflow, duct configuration, water hardness, and climate also affect performance and maintenance.
Check: The model’s documentation lists your heating equipment or system type as compatible and provides a capacity suitable for the home.
Step 4: Plan professional installation
Give the installer the furnace or air-handler model, humidifier model, and any known details about the water supply and nearby drain. Ask where the unit, humidistat, shutoff, and drain will go, and confirm how the installation will be tested. Have a licensed HVAC professional handle work that involves cutting ducts, connecting plumbing, or wiring.
Tip: Follow local permit and code requirements. Improper drain routing or water connections can cause leaks and equipment damage.
Check: The installer has confirmed the location, required connections, service access, and installation requirements before work begins.
Step 5: Set an initial humidity target
After installation, set the humidistat to about 30% relative humidity during cold weather, then monitor the hygrometer and windows for several days. Raise the setting gradually only if the home remains free of condensation. Follow the manufacturer’s instructions if the control uses an outdoor-temperature chart or automatic mode.
Tip: As outdoor temperatures fall, the safe indoor humidity may also fall. Use the lowest setting that provides comfort without window condensation.
Check: The indoor reading approaches the target without persistent droplets, frost, or damp surfaces.
Step 6: Check operation during a heating cycle
Run the heating system according to the humidifier manual. Confirm that the control calls for humidity, water flows only when expected, and the drain carries water away without leaking. Check that the furnace or air handler continues to operate normally. If anything appears abnormal, turn off the humidifier and contact the installer.
Tip: Some models operate only when the heating system is running; steam units may follow different controls. Use the model’s instructions to interpret normal operation.
Check: The humidifier runs as described in its manual, drains correctly, and leaves nearby surfaces dry.
Step 7: Create a maintenance schedule
Write down the manufacturer’s cleaning and replacement intervals. Inspect the water panel, pad, or filter at least once during the heating season, and clean or replace it as directed. Check the drain, water line, and surrounding area for mineral buildup or leaks. Turn off power and water before servicing, following the manual.
Tip: Hard water can shorten panel life and leave mineral deposits. Use only the treatment or replacement parts approved for the model.
Check: You know the service interval and can access the parts that need routine inspection.
Common Mistakes to Avoid
- Skipping seasonal cleaning or replacing the wrong water panel. — Follow the exact model’s maintenance instructions and part numbers; mineral deposits can reduce output and affect operation.
Troubleshooting
Problem: The unit has mineral scale, odor, or weak output.
Solution: Turn off power and water, then clean or replace service parts according to the manual. Check the drain and water panel for deposits. Contact the manufacturer or technician if cleaning does not restore normal operation.
What Success Looks Like
The humidifier is compatible with the heating system, operates as its manual describes, and does not leak. Indoor humidity stays near the chosen target, generally around 30–40% in many homes during heating season, without recurring condensation or dampness. You also have a maintenance schedule and know how to shut off the unit before service.
Next Steps
Check humidity and windows weekly during cold weather, and lower the setting when outdoor temperatures drop or condensation appears. Inspect and clean or replace the water panel at the interval in the manual, and arrange professional service if the unit leaks, fails to operate, or affects furnace performance. At the end of heating season, follow the manufacturer’s instructions for shutting down and storing the humidifier.
Frequently Asked Questions
What humidity setting should I use?
Start near 30% during cold weather and adjust based on indoor readings and condensation. Some homes can support 40%, while others need a lower setting. Follow any outdoor-temperature guidance supplied with the control.
Can I install a whole-house humidifier myself?
Some homeowners can complete limited work if they have the required skills and local rules allow it. Many installations involve duct, plumbing, and electrical connections, so use a licensed HVAC professional when the work exceeds your qualifications or the manual’s scope.
How often does the water panel need replacement?
Use the interval specified for your model. Water hardness, operating hours, and mineral buildup affect panel life, so inspect it during the heating season as well.
Should I run the humidifier all year?
Most furnace-connected humidifiers are used during heating season, when indoor air often becomes dry. Follow the model’s seasonal instructions, and turn it off when it is not needed.