
Before you start sanitizing lines after installation, you should thoroughly inspect all components to ensure proper disassembly and check for damage, corrosion, or misalignment. Remove any residual manufacturing debris by flushing with suitable cleaning agents, then disinfect all internal surfaces with approved sanitizers. Confirm fittings are secure and assembled correctly, and verify the system is clean, leak-free, and ready for use. Continuing this process will help you master a thorough maintenance checklist for safe, effective line sanitation.
Key Takeaways
- Verify proper disassembly and inspect lines for damage, corrosion, or misalignment before cleaning.
- Conduct a thorough visual inspection to identify any debris, obstructions, or residues inside the lines.
- Ensure all fittings, valves, and connections are secure, leak-free, and correctly positioned.
- Confirm chemical compatibility and proper rinsing to prevent contamination during sanitization.
- Document inspection results, including any issues found, to maintain an accurate maintenance record.

Beer Keg Line Beer Cleaning kit with 4oz Beer Line Cleaner – Hand Pump Pressurized – Easy Safe to Use Keg Cleaner – Brush Faucet Plug – With Ball Lock Keg Adapter
FOR A SEAMLESS BEER LINE CLEANING with ball lock connection – This home kegerator and brewery machine cleaner…
As an affiliate, we earn on qualifying purchases.
As an affiliate, we earn on qualifying purchases.
Verify Proper Disassembly and Inspection of Lines

Before sanitizing, you need to verify that the lines have been properly disassembled and inspected. Ensuring line integrity is vital, as any damage or misalignment can compromise the cleaning process. Carefully examine each segment for cracks, corrosion, or signs of wear that could lead to contamination or system failure. Proper inspection helps prevent corrosion, which can weaken the pipes and introduce bacteria or debris. Confirm that all fittings, valves, and connections are secure and undamaged. If you find corrosion or damage, address it immediately before proceeding. Maintaining line integrity through thorough inspection not only supports effective sanitizing but also extends the lifespan of the piping system. Reviewing paint sprayer maintenance procedures can help identify potential issues early and ensure optimal performance after installation maintenance. Taking these steps ensures a safe, clean, and reliable system after installation maintenance.

Daxiongmao Endoscope Camera with Light, 1080P HD Borescope, IP67 Waterproof Snake Camera – Ideal for Inspecting Walls, Vents, Automotive Engines, Pipes – A Great Gift Tool for Men (16.5ft)
【4.3-INCH LCD DISPLAY】HD Endoscope camera with a 4.3-inch color LCD screen that allows you to view high-definition images…
As an affiliate, we earn on qualifying purchases.
As an affiliate, we earn on qualifying purchases.
Remove Residual Manufacturing Debris and Contaminants
You need to check the lines carefully for any leftover manufacturing residue that might compromise sanitation. Using the right cleaning agents guarantees you effectively remove debris and contaminants. This step is vital to prepare the lines for proper sanitization and safe operation. Ensuring proper bedroom organization can also help identify areas where residues may accumulate.
Inspect for Manufacturing Residue
Inspecting for manufacturing residue is a vital step to guarantee your lines are clean and safe for use. Manufacturing residues, such as oils, greases, or metal shavings, can cause line contamination if left unchecked. Carefully examine all surfaces, fittings, and internal components for any visible debris or residue. Use proper lighting and, if necessary, magnification tools to spot hidden contaminants. This inspection helps identify areas where residues may have settled during manufacturing or installation. Removing these residues prevents potential contamination risks and ensures the product’s safety and quality. Skipping this step could lead to compromised hygiene standards and costly rework later. Thorough inspection now sets the foundation for effective sanitization and optimal line performance. Additionally, understanding market trends can inform best practices for maintaining high standards of cleanliness and safety.
Use Appropriate Cleaning Agents
Selecting the right cleaning agents is vital for effectively removing residual manufacturing debris and contaminants. You must consider chemical compatibility to prevent damage to your lines and guarantee thorough cleaning. Using incompatible chemicals can compromise the integrity of your system and hinder sanitization efforts. Opt for agents specifically designed for your line’s materials and contaminants. Additionally, choose cleaning solutions that support spill containment to avoid leaks or spills that could cause contamination or safety hazards. Properly selecting and applying these agents ensures that debris is dissolved and flushed out without introducing new contaminants. Always follow manufacturer instructions, and verify chemical compatibility to maintain the integrity of your system while achieving effective cleaning. This step is essential for a safe, clean, and compliant line.

KWIK-E-VAC Line Set Flushing Kit Installation Simplifier for Mini Split Air Conditioning Systems
Flush the air and other non-condensable gases out of the copper line set and indoor unit
As an affiliate, we earn on qualifying purchases.
As an affiliate, we earn on qualifying purchases.
Flush All Piping and Tubing With Suitable Cleansing Agents

Before proceeding with any sanitization, it’s essential to thoroughly flush all piping and tubing with suitable cleansing agents. This step guarantees removal of residues and contaminants, preventing bacterial growth. When choosing cleansing agents, consider chemical compatibility to avoid damaging your equipment or compromising safety. Proper flushing also helps maintain equipment calibration, ensuring accurate operation post-cleaning. Keep these points in mind:
- Verify cleansing agents are compatible with piping materials
- Use appropriate flow rates to reach all areas
- Ensure thorough rinsing to eliminate residual agents
- Follow manufacturer recommendations for contact time
- Inspect for signs of chemical reactions or damage
- Additionally, understanding industry trends can guide selecting the most effective cleaning practices.

Quickun 1/2" One Way Inline Check Valve, Non Return Hose Barb, Ozone Resistance Plastic Valve for Fuel Oil Water Gas Pump Air, 2 Pcs
【One-Way Flow Control】Spring-loaded valve design ensures unidirectional flow, preventing backflow and pressure surges. Safeguards pumps, compressors, and hydraulic…
As an affiliate, we earn on qualifying purchases.
As an affiliate, we earn on qualifying purchases.
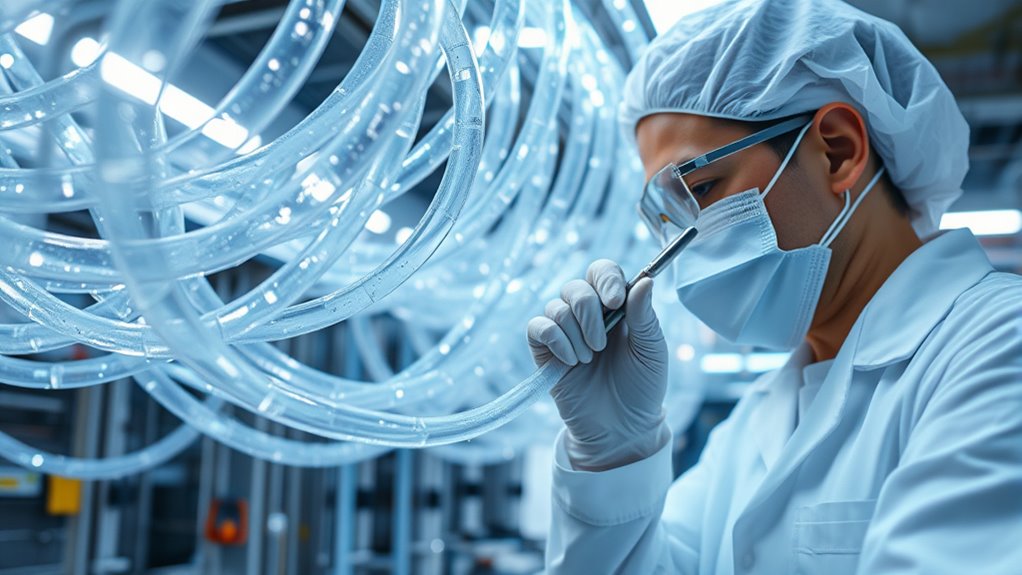
Conduct Visual Inspection for Residues or Obstructions

You need to carefully examine the lines for any debris or residues that might have been overlooked. Look closely for obstructions that could interfere with flow or cause contamination. Identifying these issues early ensures your system stays clean and functions properly. Additionally, inspecting for potential sources of bacterial growth can help prevent contamination and maintain hygiene standards.
Check for Debris
Have you thoroughly visualized the lines to spot any debris or obstructions? A clear visual inspection helps guarantee nothing compromises the system. Look closely for dirt, foreign objects, or blockages that could interfere with proper flow. Keep these key points in mind:
- Confirm the lines are clean and free of debris before proceeding
- Check for any signs of chemical incompatibility with stored materials
- Verify storage guidelines were followed to prevent contamination
- Remove any loose particles or residues that might have fallen during installation
- Verify there are no obstructions blocking the path, which could cause pressure issues
- Remember that maintaining system integrity is essential for optimal performance and safety.
This step helps prevent future problems and guarantees the lines are ready for proper sanitization. Always remember, maintaining chemical compatibility and proper storage guidelines is essential for system integrity.
Inspect for Residue
Is there any residue or obstruction lingering inside the lines? Carefully inspect visually to verify the interior is clear of any debris or leftover substances. Use a flashlight if needed to see into tight bends or corners. Confirm that the cleaning agents used are compatible with the line materials by checking chemical compatibility. Residues from previous fluids can compromise system performance or cause contamination, so thorough inspection is essential. Remember to follow safety precautions—wear gloves and eye protection, especially if residues are suspected to be chemical-based. If you notice any residues or obstructions, do not proceed until you remove them completely. Proper visual inspection helps prevent potential issues and ensures your lines are ready for safe, effective operation. Additionally, understanding water quality and residue types can help you identify and address specific contamination concerns more effectively.
Identify Obstructions
After inspecting the interior for residues, the next step is to identify any obstructions that may still be present. Obstructions can hinder airflow optimization and increase noise levels, affecting system performance. Carefully examine all lines and components for blockages, loose debris, or buildup that wasn’t removed during cleaning. Pay close attention to areas where residues or obstructions could restrict airflow or cause noise issues. Use a flashlight if necessary to spot hidden debris. Addressing these obstructions ensures your system runs smoothly and quietly. Be thorough in your visual inspection to prevent future complications. Remember, even small blockages can compromise airflow efficiency and noise reduction efforts. Taking the time now prevents more extensive maintenance later and keeps your system operating at peak performance. Regular maintenance can also help identify system inefficiencies early, preventing costly repairs down the line.
Disinfect Lines Using Approved Sanitizing Solutions

To guarantee the lines are properly disinfected, you need to use approved sanitizing solutions specifically designed for this purpose. These solutions ensure effective chemical sterilization or cold sterilization, depending on your equipment and requirements. Chemical sterilization involves using specialized disinfectants that eliminate bacteria, viruses, and fungi, providing a high level of sanitation. Cold sterilization is ideal when heat-sensitive equipment is involved, as it allows thorough cleaning without damaging components. Follow the manufacturer’s instructions carefully when applying these sanitizers, ensuring complete coverage of all internal surfaces. Properly measuring and mixing the solutions is vital for effectiveness. Implementing automation technologies can streamline the sanitization process and ensure consistent application. Remember, using the right approved sanitizing solution reduces the risk of contamination and maintains the integrity of your lines after installation.
Confirm Complete Rinsing and Flushing Post-Sanitization

Once you’ve completed the sanitizing process, it’s essential to thoroughly rinse and flush the lines to remove any residual sanitizing agents. Proper rinsing guarantees chemical compatibility with subsequent processes and prevents contamination. To confirm complete rinsing and flushing:
- Use clean, potable water to avoid introducing new contaminants
- Monitor flow rates to ensure thorough coverage
- Check for any lingering sanitizer residues
- Verify that all lines are free of sanitizer before moving on
- Train staff to recognize signs of incomplete rinsing
Effective staff training ensures everyone understands proper procedures and the importance of flushing. This step guarantees the lines are safe, clean, and ready for use, minimizing risks of chemical reactions or contamination. Always double-check that rinsing is complete before proceeding.
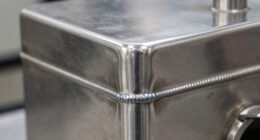
Check for Proper Assembly and Secure Fittings

You need to guarantee all connections are properly tightened to prevent leaks. Carefully inspect each fitting to spot any signs of drips or looseness. Confirm that everything is assembled correctly to maintain system integrity and safety.
Verify All Connections Tightened
Ensuring all connections are properly tightened is a crucial step after installing or maintaining lines. Loose fittings can lead to leaks, contamination, or equipment damage. Before proceeding, double-check each connection, guaranteeing the fittings are secure and free from cross-threading. Use calibrated tools to verify torque specifications, especially for sensitive components. Pay attention to chemical compatibility to prevent corrosion or degradation that might loosen fittings over time. Remember, improperly tightened connections may cause pressure drops or flow issues, compromising sanitation. Consider these key points:
- Confirm all fittings are hand-tightened before final torque
- Use calibrated tools to guarantee proper tightening
- Check for signs of corrosion or wear
- Verify fittings are compatible with the chemicals used
- Guarantee all connections follow manufacturer torque specifications
Taking these steps guarantees safe, reliable, and compliant line operation.
Inspect for Leaks Carefully
After verifying all connections are properly tightened, it’s important to inspect the lines for leaks. Carefully check each fitting and joint, looking for drips, moisture, or any signs of seepage. Leaks can compromise odor control by allowing unpleasant smells to escape and can hinder microbial prevention efforts by creating an environment for bacteria to grow. Pay close attention to areas where fittings connect, ensuring they’re secure and properly sealed. Use a flashlight if needed to spot tiny leaks that might be hard to see. Detecting leaks early prevents contamination and maintains the integrity of your sanitization process. Confirm that all fittings are tight and leak-free before proceeding to the next step, ensuring your system stays clean, odor-controlled, and microbial prevention is maintained.
Confirm Proper Assembly
Before moving on, double-check that all components are properly assembled and fittings are secure. Guarantee proper assembly prevents leaks and contamination, especially after using cleaning agents. Follow your inspection protocols carefully to verify tight connections and correct placement of parts. Look for signs of misalignment or loose fittings that could compromise the system’s integrity. Confirm that all fittings are tightened to manufacturer specifications, and no components are missing or incorrectly installed. Proper assembly is essential to maintain sanitation and equipment longevity. Here are key steps to follow:
- Verify all fittings are tight and secure
- Check for any visible damage or misalignment
- Confirm parts are installed according to manufacturer instructions
- Inspect for proper flow paths and clearances
- Ensure no debris or residues interfere with fittings
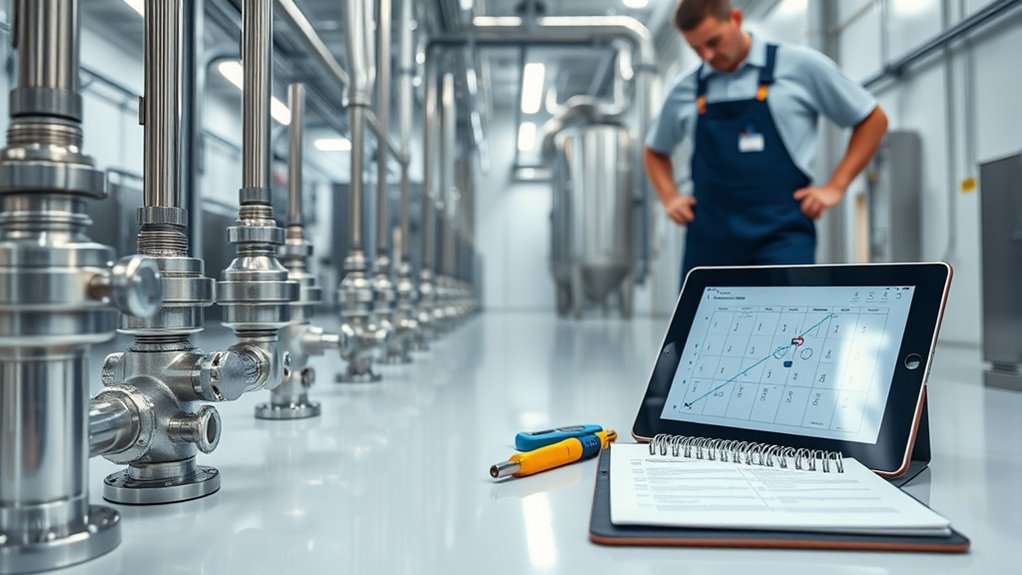
Document Sanitization Procedures and Results

To verify the effectiveness of the sanitization process, you must meticulously document each step and its outcomes. Record details such as cleaning agents used, contact times, temperatures, and flow rates, guaranteeing all procedures align with safety protocols. Confirm chemical compatibility to prevent equipment damage or contamination. Document any deviations from standard procedures and note corrective actions taken. Keep detailed records of test results, including visual inspections and testing methods like swab tests or microbial assays. This documentation provides a clear audit trail and helps verify that the lines meet cleanliness standards. Accurate records ensure compliance with safety protocols and facilitate future maintenance or troubleshooting. Consistent documentation reinforces confidence in the sanitization process’s integrity and effectiveness.
Test System Pressure and Flow Rates

Maintaining proper system pressure and flow rates is essential to guarantee effective sanitization and prevent damage to the lines. You should verify these parameters to assure your system operates within recommended ranges, aligning with your cleaning schedules and safety protocols. Proper flow ensures disinfectants reach all surfaces, while correct pressure prevents leaks or ruptures. To test system pressure and flow rates, consider the following:
Consistently verify system pressure and flow to ensure safe, effective sanitization and prevent damage.
- Use calibrated gauges to measure pressure at key points
- Confirm flow rates match manufacturer specifications
- Adjust pump settings if readings fall outside acceptable ranges
- Document readings for compliance and troubleshooting
- Conduct tests before starting sanitization procedures
Consistently testing system pressure and flow helps avoid contamination risks and equipment failure, making it a crucial step in your maintenance routine.
Record Final Inspection and Readiness for Operation

Conducting a final inspection is essential to guarantee the system is fully prepared for operation. During this step, verify that all components meet safety protocols and that the system’s chemical compatibility has been maintained throughout the cleaning process. Check for leaks, proper valve positions, and secure connections. Ensure that all sanitizing agents have been thoroughly rinsed and that no residues remain. Document the inspection results accurately, noting any discrepancies or issues that could affect safety or efficiency. Confirm that the system is ready to handle the intended chemicals and products without risk. This final record helps ensure compliance with safety standards and provides a clear confirmation that the lines are sanitized, safe, and prepared for continuous operation.
Frequently Asked Questions
How Often Should Lines Be Sanitized After Installation?
You should sanitize lines regularly, ideally every 3 to 6 months, depending on your cleaning frequency and equipment usage. Consistent sanitizing is essential for proper equipment maintenance and preventing contamination. If your operation involves frequent or heavy use, consider more frequent cleaning. Always follow manufacturer guidelines and industry standards to guarantee your lines stay hygienic, safe, and in prime condition. Proper maintenance helps extend equipment lifespan and maintains product quality.
What Safety Precautions Are Necessary During the Sanitizing Process?
You must prioritize safety during sanitizing by wearing protective gear like gloves, goggles, and masks—think of it as armor against hazards. Guarantee proper ventilation to prevent fumes from building up, which could feel like breathing in a storm. Always follow manufacturer instructions and keep a fire extinguisher nearby. Staying alert and cautious helps you work safely, avoiding accidents and ensuring the sanitizing process is effective and hazard-free.
Are There Specific Cleaning Agents Recommended for Certain Line Materials?
Yes, you should choose cleaning agents based on chemical compatibility with your line materials. For example, stainless steel lines often tolerate alkaline cleaners, while plastic lines may require milder, non-abrasive agents. Always check manufacturer recommendations to guarantee the cleaning agents won’t damage or degrade your lines. Using incompatible cleaning agents can compromise the integrity of your lines, so selecting the right chemical based on material compatibility is essential for effective and safe sanitizing.
How to Identify if Residual Contaminants Remain After Cleaning?
You can identify residual contaminants by performing residual testing and contamination detection. Start with visual inspections for any residues or discoloration. Use specific test kits or swabs to sample the line interior for contamination. Conduct chemical analysis if necessary, checking for residues of cleaning agents or other contaminants. If tests show traces of unwanted substances, repeat the cleaning process until residual testing confirms the line is thoroughly sanitized.
What Are the Signs of Improper Line Assembly Post-Sanitization?
You’ll notice signs of improper line assembly when there’s compromised line integrity, such as leaks, unusual pressure drops, or inconsistent flow rates. These issues increase contamination risks because gaps or misaligned fittings can allow contaminants to enter the system. Always double-check connections and fittings after sanitization, ensuring everything is tightened and aligned correctly. Proper assembly prevents contamination and maintains system efficiency, safeguarding your process quality.
Conclusion
By thoroughly sanitizing and inspecting your lines, you minimize contamination risks and guarantee ideal system performance. Some experts believe that proper cleaning can even prevent microbial growth that might go unnoticed initially. So, don’t skip any steps—your attention to detail could be the difference between a safe, efficient operation and costly issues down the line. Trust the process, and you’ll safeguard your equipment and health while confirming the theory that cleanliness truly is next to safety.