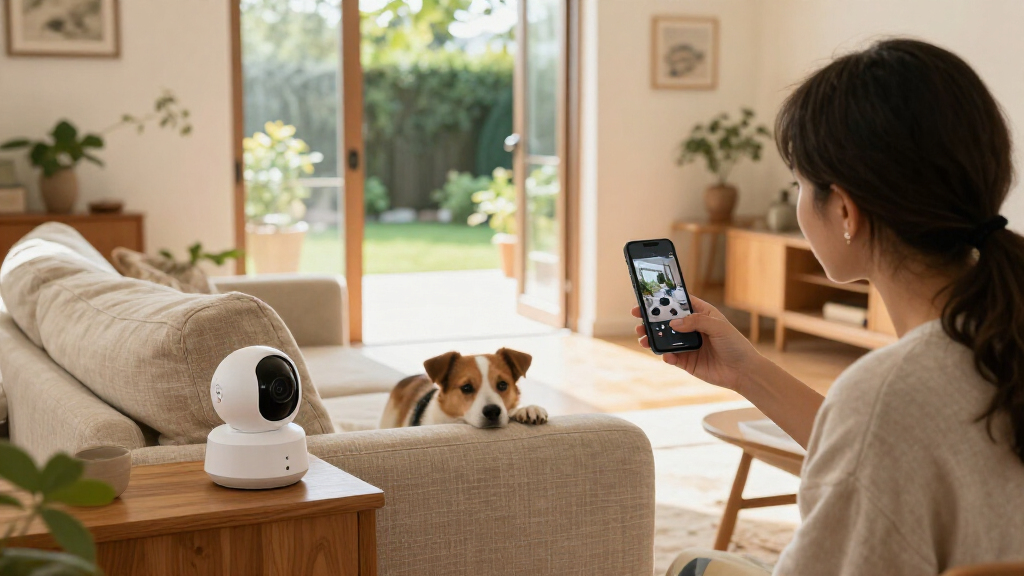

Set up smart home security cameras by choosing suitable locations, connecting each camera to your network, configuring recording and alerts, and checking that live video works. This guide is for homeowners and renters installing consumer Wi-Fi cameras for the first time. Allow 1-3 hours, depending on the number of cameras, mounting needs, and network setup.

Get home appliances delivered free with Prime
- Fast, free delivery on millions of items
- Prime Video, Amazon Music and more included
- Member-only deals all year

Blink Outdoor 4 and Wired Doorbell 2K+ Security System (5 Cameras + Doorbell)
- ✔ Bundle contents: 5 Outdoor 4 cameras, 1 Wired Doorbell 2K+, Sync Module Core, batteries and mounting kits
- ✔ Outdoor camera video: 1080p HD
- ✔ Doorbell video: 2K (1920 × 1920)
Blink Outdoor 4 and Wired Doorbell 2K+ Security System (3 Cameras + Doorbell, Black)
- ✔ Bundle contents: 3 Outdoor 4 cameras, 1 Wired Doorbell 2K+, Sync Module Core
- ✔ Outdoor camera video: 1080p HD
- ✔ Doorbell video: 2K (1920 × 1920)

4-Pack 2K Solar Wireless Security Camera System with AI Detection and Two-Way Audio
- ✔ Bundle contents: 4 dome cameras with solar panels
- ✔ Resolution: 2K
- ✔ Connectivity: Dual-band Wi-Fi, 2.4 GHz and 5 GHz
Difficulty: Beginner | Time: 1-3 hours
What You’ll Need
Tools & Materials:
- Smartphone or tablet with the camera maker’s app
- Camera, power adapter, and included mounting hardware
- Home Wi-Fi name and password
- Drill and screwdriver if permanent mounting is allowed
- Ladder for high locations, used on stable ground
Knowledge:
- Basic use of a smartphone app
- Ability to connect a device to a home Wi-Fi network
- Permission to install equipment where you live
Check the camera’s supported Wi-Fi bands, power requirements, storage options, and weather rating before installation. Some cameras only connect to 2.4 GHz Wi-Fi. Read the manufacturer’s instructions, and check lease or building rules before drilling.
Blink Outdoor 4 and Wired Doorbell 2K+ Security System (5 Cameras + Doorbell)
When we want to watch several sides of a home alongside the front entry, this Blink bundle gives us the most camera positions in the lineup: five Outdoor 4 cameras plus a wired doorbell. That makes it a stronger fit for a larger property than the three-camera Blink set, which shares the same basic camera and doorbell format but leaves more areas uncovered. The outdoor cameras record in 1080p HD with a 143-degree diagonal field of view; at the door, the 2K head-to-toe view is designed to show visitors and packages in a tall frame.Power and ecosystem needs are central to the choice. Blink states up to two years of battery life for each Outdoor 4 under its specified conditions, reducing how often we need to replace batteries. The doorbell, however, needs existing wiring, and the entire bundle uses 2.4 GHz Wi-Fi. Alexa compatibility is useful for homes already organized around that assistant, while advanced smart detection and cloud retention require a separate subscription plan. Compared with the solar four-pack, Blink provides a dedicated doorbell and many fixed camera positions, but it lacks pan-tilt movement and the listed local MicroSD storage option.We should choose this set when coverage breadth matters more than minimizing the number of devices. Its tradeoff is a bigger installation footprint, plus wiring and network requirements that can rule it out for some homes.
Pros:
- Five outdoor cameras provide the most fixed outdoor coverage among these bundles.
- The 2K doorbell view is designed to capture visitors and packages from head to toe.
- Outdoor 4 cameras use AA lithium batteries, with up to two years of stated battery life.
- Weather-resistant cameras support outdoor operation across the listed temperature range.
Cons:
- Advanced smart detection and cloud storage retention require a separate subscription plan.
- The doorbell needs existing wiring for power.
- The system supports 2.4 GHz Wi-Fi only.
Best for: Households that want to monitor multiple outdoor zones and the front door through an Alexa-compatible system.
Not ideal for: Anyone without compatible doorbell wiring, a 2.4 GHz Wi-Fi network, or room for five camera placements.
Bottom line: Choose this bundle when broad fixed outdoor coverage and a wired 2K doorbell matter more than installation simplicity.
“Choose this bundle when broad fixed outdoor coverage and a wired 2K doorbell matter more than installation simplicity.”
Blink Outdoor 4 and Wired Doorbell 2K+ Security System (3 Cameras + Doorbell, Black)
This three-camera set makes the most sense when we want the Blink doorbell experience and several outdoor views without installing five cameras. Its 2K wired doorbell and 1080p Outdoor 4 cameras match the larger Blink bundle’s core format, so we give up two camera positions rather than the headline doorbell capability. Compared with the five-camera set, it suits a smaller home or a buyer who already has other coverage and only needs a few additional angles.The outdoor cameras run on AA lithium batteries, with up to two years of life stated at default settings. That can mean less routine maintenance than a plug-in setup, though the doorbell itself still depends on existing wiring. Alexa integration keeps the system in the same smart home ecosystem as its larger sibling. Like that bundle, it connects over 2.4 GHz Wi-Fi and requires a separate plan for advanced detection and extended cloud storage. The solar four-pack is more flexible where power or camera movement is the priority, but it does not offer the supplied wired doorbell.We would pick this version for a focused setup around an entry, driveway, and one other outdoor area. It is less suitable when we need perimeter coverage around a larger property; the smaller bundle does not make the wiring, Wi-Fi, or subscription considerations disappear.
Pros:
- Pairs three 1080p outdoor cameras with a 2K head-to-toe doorbell.
- Stated camera battery life of up to two years can reduce battery changes.
- Alexa compatibility integrates with supported smart home routines and devices.
- Weather-resistant design is specified for operation from -4°F to 113°F.
Cons:
- Three cameras cover fewer outdoor zones than the five-camera Blink bundle.
- The wired doorbell requires compatible existing wiring.
- Advanced detection and extended cloud storage require a separate subscription plan.
Best for: Buyers who want a 2K doorbell and a few battery-powered outdoor cameras for a smaller home or targeted coverage plan.
Not ideal for: Households that need many camera positions, lack doorbell wiring, or want local storage without a subscription-dependent cloud setup.
Bottom line: Choose the three-camera Blink set when a wired 2K entry view and a modest number of outdoor cameras cover your needs.
“Choose the three-camera Blink set when a wired 2K entry view and a modest number of outdoor cameras cover your needs.”
4-Pack 2K Solar Wireless Security Camera System with AI Detection and Two-Way Audio
For homes where running power or doorbell wiring would be difficult, this four-camera system offers a different path: solar panels with built-in battery backup and fully wireless placement. Its 2K cameras use pan-tilt coverage, so each unit can look across a wider area by moving rather than relying only on a fixed viewing angle. That makes it distinct from both Blink bundles, whose Outdoor 4 cameras are fixed-position 1080p units and whose packages include a dedicated doorbell.The system also lists AI human detection, color night vision, and dual-band Wi-Fi support. Dual-band connectivity may suit a home network that uses both 2.4 and 5 GHz, unlike the Blink bundles’ 2.4 GHz-only connection. Storage is flexible: we can use a MicroSD card or optional cloud services, with no forced cloud subscription described. The card is not included, so local recording requires an additional setup step. The listed night vision range is 328 feet, but real coverage still depends on placement and conditions.Solar power has its own constraint: the cameras need at least two hours of daily sunlight for optimal charging. Compared with Blink, this option avoids doorbell wiring and brings pan-tilt movement, but it does not include a doorbell and depends on suitable sun exposure. We should choose it for placement flexibility and local storage, provided the mounting spots can meet the charging requirement.
Pros:
- Solar panels and built-in batteries support wireless installation without camera power wiring.
- Pan-tilt movement can cover more than one direction from a camera position.
- Dual-band Wi-Fi supports both 2.4 GHz and 5 GHz networks.
- MicroSD storage offers a local option alongside optional cloud services.
Cons:
- Optimal solar charging requires at least two hours of daily sunlight.
- MicroSD card is not included.
- Unlike the Blink bundles, this package does not include a dedicated doorbell.
Best for: Homeowners who want wireless cameras with pan-tilt coverage, dual-band Wi-Fi, and the option to store footage on MicroSD.
Not ideal for: Buyers who need a bundled doorbell, cannot provide daily sunlight at mounting points, or want a MicroSD card included.
Bottom line: Choose this system when wireless placement, pan-tilt coverage, and local storage are priorities and your mounting locations get enough sunlight.
“Choose this system when wireless placement, pan-tilt coverage, and local storage are priorities and your mounting locations get enough sunlight.”
As an Amazon Associate we earn from qualifying purchases.
Before You Start
Choose a camera account password that you do not use elsewhere, and turn on multifactor authentication if the service offers it. Decide whether clips will be stored locally or in the cloud, and review any subscription fees before enabling a plan. Avoid pointing cameras into neighbors’ windows or private areas. Tell household members where indoor cameras are placed and when they record.
Step-by-Step Instructions
Step 1: Map the areas you need to monitor
Walk around the property and list the entrances or shared areas you want to cover, such as the front door, driveway, or living room. Mark likely mounting spots that show faces or activity clearly without capturing private spaces. Check for a nearby outlet or a suitable location for a battery model.
Tip:Do not aim a camera directly at a bright window or sunrise direction; glare can obscure the view.
Check: You have a location for each camera and know what view each one should capture.
Step 2: Check Wi-Fi and power at each location
Test the Wi-Fi signal with your phone at each planned camera location. Confirm that an outlet is within reach for a wired camera, with no cable crossing a walkway or creating a trip hazard. Charge each battery model as directed before setup.
Tip:A signal that works on a phone may still be weak for a camera streaming video. Test the camera temporarily at the intended spot before drilling.
Check: The planned location has power or a charged battery and a stable network connection.
Step 3: Install the app and secure the account
Download the official app from your phone’s app store. Create or sign in to an account, set a unique password, and enable multifactor authentication when available. Grant only the app permissions needed for setup and notifications.
Tip:Verify the app publisher before installing it, especially if you reach it through a QR code or a third-party site.
Check: You can sign in to the manufacturer’s app and reach its camera setup screen.
Step 4: Add each camera to the app
Power on one camera at a time. In the app, select the option to add a device and follow the pairing prompts. Scan the camera’s setup code or enter its identifier, then select the correct Wi-Fi network and enter its password. Name the camera for its location, such as “Front Door.” Repeat these actions for each remaining camera.
Tip:If the app requests a 2.4 GHz network, select that network rather than a 5 GHz-only connection. Keep the phone near the camera during pairing.
Check: Each camera appears in the app with the correct name and an available live view.
Step 5: Mount and aim the cameras
Place each paired camera temporarily at its planned position and check its live view. Adjust the height and angle until the target area is visible. Follow the supplied mounting instructions to secure the bracket to an appropriate surface and attach the camera. Protect outdoor power connections as the manufacturer directs.
Tip:Do not mount a camera where it can be reached easily or where its view is blocked by a door, plant, or seasonal decoration.
Check: The mounted camera shows the intended area, and its image remains stable when the mount is gently checked.
Step 6: Set recording, alerts, and privacy controls
Open each camera’s settings in the app and choose when it records and which events trigger alerts. Set motion zones to include the areas you care about and exclude public sidewalks or neighboring property where possible. Set notification hours and sensitivity to suit the location. Review microphone, audio recording, and privacy-shutter settings, and disable features you do not need. Select local or cloud storage and confirm any retention or subscription settings.
Tip:Start with moderate motion sensitivity. Excessive sensitivity can create frequent alerts from passing cars, pets, or moving branches.
Check: The camera’s recording schedule, alert rules, privacy settings, and storage choice are visible in the app.
Step 7: Test the full camera setup
Open live video from each camera while your phone is connected to home Wi-Fi. If remote viewing is part of your plan, repeat the check using your phone’s mobile connection. Walk through each monitored area to trigger an event, then check that the alert arrives and the clip or event appears in the timeline. Adjust the camera angle or motion zone if the test misses the activity.
Check: Live video loads, a test event is detected, and its recording can be played back.
Common Mistakes to Avoid
- Mounting the camera before checking its view and Wi-Fi signal. — Pair it first and test the intended position with live video before drilling or fixing the mount.
- Using a weak or reused account password. — Use a unique password and enable multifactor authentication when available.
- Leaving motion sensitivity or zones at default settings. — Run a walk test, tune the detection area, and adjust sensitivity to reduce missed events and nuisance alerts.
- Pointing a camera into a private area or neighbor’s property. — Review the live view from the mounted position and use privacy masks or a different angle where needed.
Troubleshooting
Problem: The camera will not connect to Wi-Fi.
Solution: Confirm the password, check whether the camera requires 2.4 GHz Wi-Fi, and move it closer to the router during pairing. Restart the camera and router if the manufacturer recommends it, then try setup again.
Problem: The live view is slow or keeps disconnecting.
Solution: Check signal strength at the camera, reduce distance or obstructions, and avoid placing the router behind metal or inside a cabinet. If needed, reposition the router or use a compatible access point.
Problem: Motion alerts arrive too often.
Solution: Narrow the motion zone, lower sensitivity, and exclude busy streets, moving foliage, or areas used by pets. Test the adjusted settings before relying on them.
Problem: No recording appears after a test event.
Solution: Check that recording is enabled for that event type, confirm the storage plan or memory card is active, and verify the camera’s date and time settings. Trigger another test and check the event timeline.
What Success Looks Like
The setup is complete when every camera has a clear, stable view of its intended area; live video works; a test movement triggers the expected alert and playback; storage settings match your choice; and privacy controls exclude areas you do not intend to monitor.
Next Steps
Review camera views after a few days, especially after lighting or weather changes. Charge batteries or check power and storage status on the schedule recommended by the manufacturer. Install firmware updates through the official app, keep account security settings current, and repeat the motion test after changing camera placement or alert rules.
Frequently Asked Questions
Do smart security cameras need Wi-Fi?
Most consumer smart cameras need Wi-Fi for app setup, remote live viewing, and cloud features. Some models can record locally during an internet outage, but remote access may stop until the connection returns. Check the model’s specifications for offline behavior.
Can I install a camera without drilling?
Many indoor cameras can sit on a shelf, and some models offer adhesive or clamp mounts. Use only mounting methods approved for the camera and surface, and check that the camera cannot fall or be easily moved.
Should I use cloud or local storage?
Cloud storage can make clips available away from home, but may require a subscription and an internet connection. Local storage may avoid recurring fees, though the camera or card could be damaged or removed. Compare retention, access, and outage behavior before choosing.
Why does my camera miss movement?
The view may be poorly aimed, the Wi-Fi weak, or motion sensitivity too low. Check the live image, move activity through the detection zone, and adjust sensitivity and zones before testing again.
How often should I check the cameras?
Check the live view and recording status after installation and whenever you change network, power, storage, or alert settings. A brief periodic check helps catch a depleted battery, disconnected camera, or failed storage device.