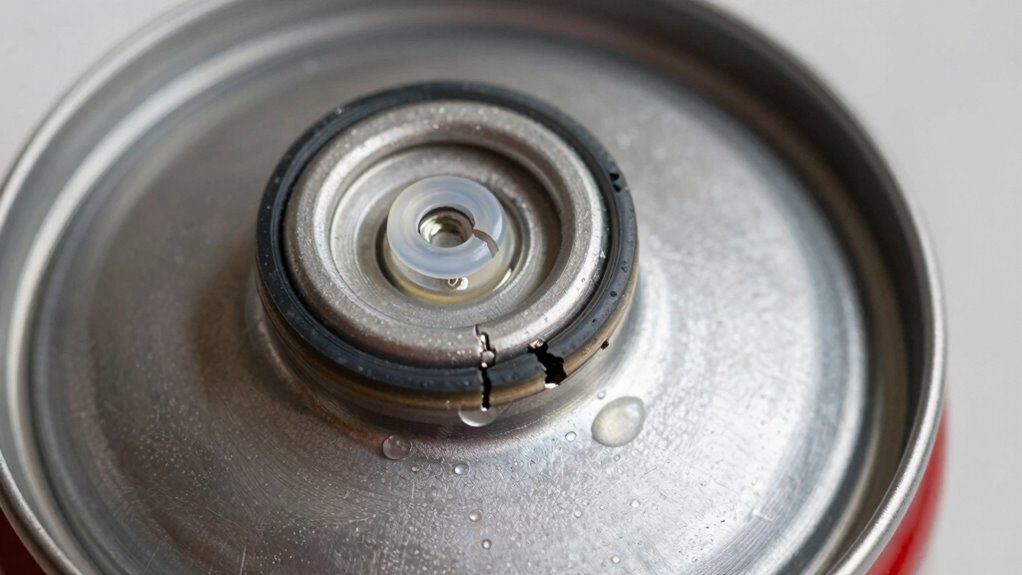

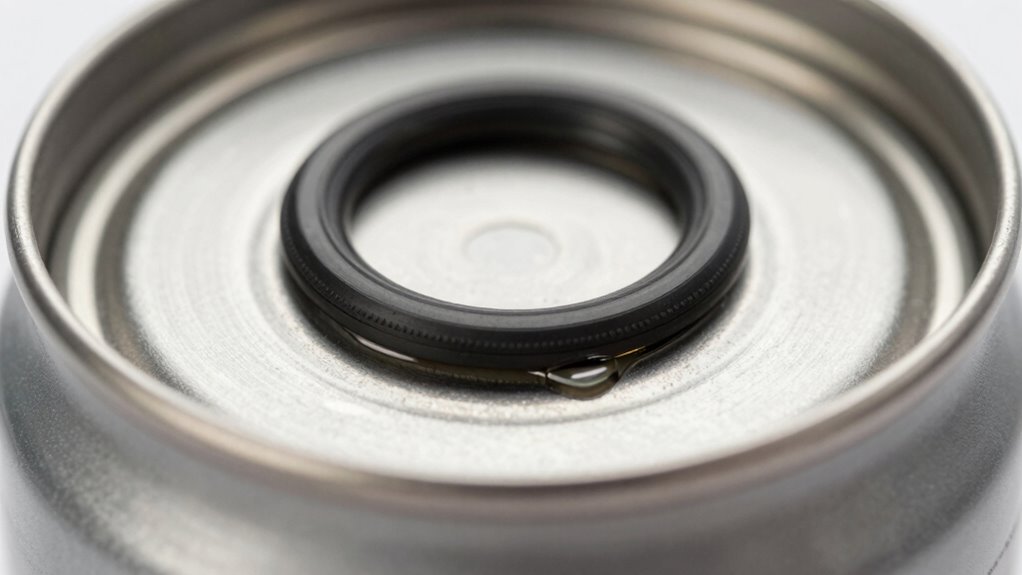
If your canister is leaking, chances are a worn or damaged O-ring is to blame. Many people overlook this small rubber seal, but it’s often the main culprit. Over time, heat, fuel vapors, and dirt cause the O-ring to crack or flatten, leading to leaks. Fixing it is simple—just replace the O-ring with the correct size. Keep going to discover how to identify signs and guarantee a proper seal for your vehicle’s safety and efficiency.
Key Takeaways
- A worn or damaged O-ring is the most common cause of canister leaks.
- Proper inspection for cracks or flattening helps identify if the O-ring needs replacement.
- Replacing the O-ring is simple and requires no special tools, just the correct size.
- Ignoring a leaking O-ring reduces fuel efficiency, increases emissions, and poses safety risks.
- Addressing the O-ring issue promptly restores system integrity and prevents costly repairs.
If your canister is leaking, the most common culprit is a worn or damaged O-ring. This small rubber ring plays a vital role in sealing the canister and preventing fuel vapors from escaping. When it’s compromised, not only does your vehicle’s fuel efficiency suffer, but safety concerns also arise. Fuel vapors are flammable, and leaks can increase the risk of fire or harmful emissions. Recognizing this simple issue can save you money and protect your health and the environment.
A worn O-ring can cause fuel vapor leaks, decreasing efficiency and increasing safety risks.
The first thing you should do is inspect the O-ring closely. Often, cracks, tears, or flattening are signs it needs replacing. Over time, exposure to fuel vapors, heat, and dirt causes these rings to degrade. Even if the damage isn’t immediately visible, a worn O-ring can still allow vapor leaks. Replacing the O-ring is a straightforward fix that can restore the integrity of the canister, improve fuel efficiency, and address safety concerns. When the seal is intact, your engine runs more efficiently because it maintains proper pressure and vapor flow. This means you’ll get better mileage, saving you money at the pump.
Many people overlook the importance of this small part, assuming the leak might be elsewhere. However, addressing the O-ring is often the most effective and economical solution. You don’t need special tools—just a replacement O-ring of the correct size and some basic mechanical know-how. Make sure to turn off the vehicle, relieve any pressure in the system, and carefully remove the canister to access the O-ring. Once you replace it, reassemble everything securely, ensuring there are no gaps or loose fittings. Afterward, start the engine and check for leaks. If you see no signs of vapor escape, you’ve successfully fixed the issue.
Ignoring a leaking canister can lead to more than just decreased fuel efficiency; it can cause your vehicle to emit higher levels of harmful vapors into the environment. This can lead to increased emissions testing failures and, in some cases, legal penalties. From a safety perspective, accumulated vapors pose a fire hazard, especially in hot weather or if you’re refueling. Addressing the O-ring problem promptly minimizes these risks and keeps your vehicle running smoothly. Additionally, understanding the importance of projector contrast ratio can help you ensure your home cinema setup offers vivid, detailed images.

Captain O-Ring – Replacement 3043B O-Rings for VP Racing Fuels 3042 Gas Can/Utility Jug Caps (6 Pack)
Part Number: 3043B O-Ring
As an affiliate, we earn on qualifying purchases.
As an affiliate, we earn on qualifying purchases.
Frequently Asked Questions
How Often Should I Replace the O‑Ring?
You should replace the O-ring whenever you notice signs of wear, cracking, or leaks. Proper maintenance involves checking O‑ring compatibility with your canister and replacing it at recommended intervals, usually every 1-2 years, depending on usage. Regular inspections help prevent leaks, ensuring your system stays efficient. By staying attentive and replacing worn O‑rings promptly, you’ll keep your equipment functioning properly and avoid costly repairs down the line.
Can I Fix the O‑Ring Myself?
Yes, you can do a DIY repair on the O-ring if you’re comfortable with basic tools. First, follow safety precautions like wearing gloves and working in a well-ventilated area. Carefully remove the old O-ring and replace it with a new one, making sure it fits snugly. Taking your time and following instructions helps prevent damage and guarantees a proper seal, saving you money and avoiding future leaks.
What Tools Are Needed for O‑Ring Replacement?
Think of fixing your O-ring as tuning a delicate instrument. You’ll need a set of small screwdrivers, tweezers, and possibly a pick tool to carefully remove and replace the O-ring. Make certain your tools are compatible with the canister’s size to avoid damage. Regular tool maintenance keeps them sharp and effective. With these tools, you can confidently handle O-ring compatibility issues and keep your canister working smoothly.
Are There Different Types of O‑Rings for Canisters?
Yes, there are different types of O-rings for canisters, mainly due to material variations and size compatibility. You need to match the O-ring’s material, like rubber or silicone, to your canister’s requirements to guarantee proper sealing. Also, check that the size fits correctly, as even a small difference can cause leaks. Always verify the specifications to select the right O-ring for your canister to prevent issues.
How Can I Tell if the O‑Ring Is Damaged?
Your O-ring might be damaged if it looks cracked, torn, or deformed—like it’s been through a war! Check for dry, brittle spots or persistent leaks. Remember, proper O-ring lubrication is key, and verify it’s compatible with your canister. If it’s misshapen or doesn’t fit snugly, it’s time to replace it to keep everything sealed tight and avoid a messy disaster.

Vapor Canister Seal for Dodge Durango 2007-2016#90A1
Includes 1 (One) Vapor Canister Seal
As an affiliate, we earn on qualifying purchases.
As an affiliate, we earn on qualifying purchases.
Conclusion
Now that you’ve fixed that stubborn leak, imagine your canister sealing tight like a fortress wall, guarding your engine’s secrets from pesky drips. With that small O-ring in place, you’re steering clear of messy mishaps, keeping everything running smoothly like a well-oiled machine. So, next time a leak threatens to break your momentum, remember this simple fix—your secret weapon against chaos, quietly holding everything together like the steady hands of a skilled craftsman.
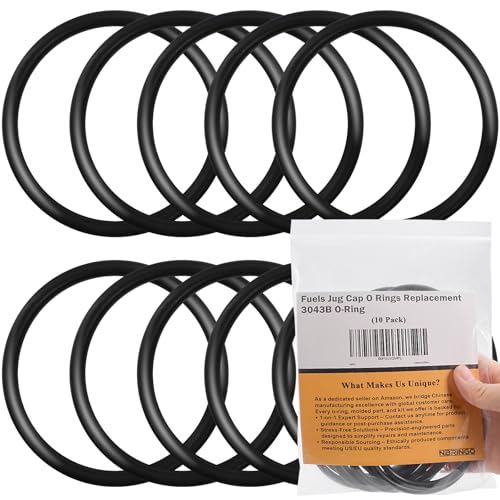
NBRINGO 10-Pack Fuels Jug Cap O Rings – Replacement 3043B O-Ring for VP Racing Fuels 3042 Utility Jug Caps – Leak Proof Seal
Buyer's Guide – Our package contains 10-Pack replaceable 3043B O-Ring. Designed specifically for VP Racing 3042 series gas…
As an affiliate, we earn on qualifying purchases.
As an affiliate, we earn on qualifying purchases.

Bar's Leaks Rear Main Seal Repair, 16.9 oz
Seals timing cover, cam seal, rear main and other hard to stop oil leaks
As an affiliate, we earn on qualifying purchases.
As an affiliate, we earn on qualifying purchases.