To fix leaks around your filter housing, first turn off the water supply and relieve pressure. Inspect the gasket for damage like cracks or brittleness and replace it if needed. Check the housing for cracks or damage—replace if necessary. Confirm the gasket is seated properly, then gently tighten the housing without overtightening. Monitor water pressure to prevent further issues. For more detailed steps and tips, continue exploring how to properly maintain and troubleshoot your system.
Key Takeaways
- Turn off water supply, relieve pressure, and inspect the gasket for damage or debris.
- Remove the old gasket, clean the sealing surface thoroughly, and replace it with a new one.
- Ensure the gasket is properly seated and the housing is tightened by hand, then tighten slightly with a wrench.
- Check water pressure with a gauge; install a regulator if pressure is too high.
- Reassemble the filter housing, turn on water slowly, and monitor for leaks to confirm proper sealing.

Leaking around filter housings is a common issue that can compromise your system’s performance if not addressed promptly. When you notice drips or moisture around your filter, it’s often due to a poor seal or worn gasket. One of the first things you should check is the water pressure in your system. Too high water pressure can cause stress on the filter housing, leading to leaks or damage over time. If the pressure is excessive, consider installing a pressure regulator to maintain ideal flow and reduce stress on the gasket and housing.
Check your water pressure; high pressure can cause leaks and damage to filter housings.
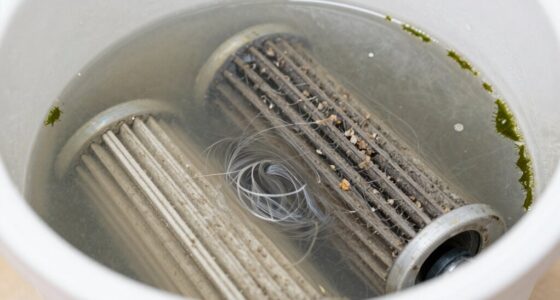
Next, inspect the gasket inside your filter housing. Gaskets are designed to create a watertight seal, but they can become brittle, cracked, or deformed after prolonged use. If you see signs of damage or deterioration, gasket replacement is your best solution. To do this, turn off the water supply, relieve pressure by opening a faucet downstream, and then carefully unscrew the filter housing. Remove the old gasket, clean the sealing surface thoroughly, and ensure there’s no debris or residue that could prevent a proper seal. When installing the new gasket, make sure it sits evenly and securely in the groove to prevent future leaks.
Once the new gasket is in place, screw the filter housing back on carefully, tightening it by hand initially, then giving it a slight turn with a wrench if necessary—be cautious not to overtighten, as this can damage the gasket or housing. After reassembling everything, turn the water back on slowly and check for leaks around the housing. If you see any drips, double-check that the gasket is seated correctly and that the housing is tightened appropriately. Also, verify that your water pressure remains within recommended levels; high pressure can cause leaks even with a new gasket.
If the leak persists despite gasket replacement and proper tightening, it might indicate a crack or defect in the housing itself. In such cases, replacing the entire filter housing may be necessary. Regular maintenance, including periodic gasket checks and monitoring water pressure, will help prevent future leaks and extend the life of your filtration system. Remember, addressing leaks early not only preserves your system’s efficiency but also saves you from costly repairs down the line. Additionally, understanding the importance of Porsche Tuning in optimizing vehicle performance can be useful if you’re considering upgrades to enhance reliability.
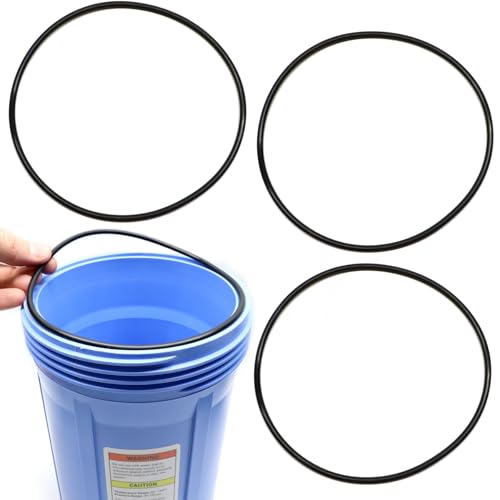
Captain O-Ring – Replacement 151122 O-Rings Compatible with Pentair Pentek Big Blue Water Filters OEM Size ORing Buna-N (3 Pack)
Replacement 151122 o-rings compatible with Pentair/Pentek style Big Blue Water Filter Housings (3 Pack)
As an affiliate, we earn on qualifying purchases.
As an affiliate, we earn on qualifying purchases.
Frequently Asked Questions
Can I Use Sealant Instead of Replacing the Gasket?
You can use sealant alternatives, but it’s not the best choice for long-term gasket longevity. Sealants might temporarily stop leaks, but they don’t provide the same durability as replacing the gasket. Over time, the sealant can break down, leading to more leaks. For a reliable fix, it’s better to replace the gasket rather than rely on sealant alternatives, ensuring your filter housing stays leak-free longer.
How Often Should Filter Housing Gaskets Be Replaced?
You should replace filter housing gaskets every 1 to 2 years to prevent leaks. For example, a homeowner noticed persistent drips after five years, realizing the gasket material had degraded. The replacement frequency depends on the gasket material, with rubber needing more frequent changes than silicone. Regular inspections, especially if you see signs of wear or leaks, help maintain a secure seal and ideal filter performance.
Are There Specific Tools Needed for Tightening the Filter Housing?
You’ll need basic tools like a wrench or pliers for tightening the filter housing. Make sure to use the correct size to avoid damaging the threads. When tightening, apply even pressure, turning clockwise until it’s snug but not over-tightened, which can cause leaks or cracks. Using the right tools and gentle tightening techniques helps guarantee a secure fit without damaging the housing or gasket, keeping your system leak-free.
What Are the Signs of a Cracked Filter Housing?
If you notice a cracked housing, you’ll see clear signs of leaks, such as water dripping or pooling around the filter area. You might also hear hissing sounds or see reduced water pressure. A cracked housing often appears visibly damaged, with cracks or fractures on the surface. Pay attention to these leak signs, as they indicate the need for a replacement to prevent further water damage or system failure.
Can Leaks Be Caused by Water Pressure Fluctuations?
Imagine you’re monitoring your water filter when suddenly, leaks appear. Pressure fluctuations can cause this, as sudden changes strain the gasket, leading to deformation or cracks. These pressure swings weaken the seal, making leaks more likely around the filter housing. To prevent this, maintain consistent water pressure and check your gasket regularly. By doing so, you help guarantee a tight seal and reduce the risk of leaks caused by pressure fluctuations.

SENCTRL 0-200 Psi Water Pressure Gauge Test with Lazy Hand, Lead-Free, Waterproof, 2.5" Dial Size, 3/4" Female Garden Hose Thread, Stainless Steel Case, for Home Potable Water, House Tube
IP67 Waterproof: The circular dial is enclosed in a 304 stainless steel case for corrosion resistance. The PRV-Tex…
As an affiliate, we earn on qualifying purchases.
As an affiliate, we earn on qualifying purchases.
Conclusion
Now that you know how to fix leaks around filter housings, you can confidently tackle the problem like a seasoned handyman. Just remember, a little patience and the right tools go a long way. Don’t let leaks turn your home into a scene from a bygone era—be the hero who restores order! With these steps, you’ll keep your system running smoothly, ensuring clean water flows without a hitch. Cheers to your DIY prowess!

68624177AA Aluminum Engine Oil Cooler & Oil Filter Housing Adapter Kit with Gaskets Sensor Compatible with 2014-2019 Ram 1500 3.0L V6 EcoDiesel, Replaces 68229403AA 68531248AA
🚗【Compatible with】 2014-2019 Ram 1500 equipped with 3.0L V6 EcoDiesel engine only. Designed to match factory specifications for…
As an affiliate, we earn on qualifying purchases.
As an affiliate, we earn on qualifying purchases.

RVGUARD RV Water Pressure Regulator Valve, CSA Approved, Lead-Free Brass Adjustable Water Pressure Reducer with Gauge and Inlet Screen Filter for RV Camper Travel Trailer
Function: Prevent water pipes from being damaged due to high pressure, suitable for campers, trailers, and RV plumbing…
As an affiliate, we earn on qualifying purchases.
As an affiliate, we earn on qualifying purchases.