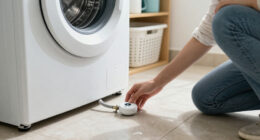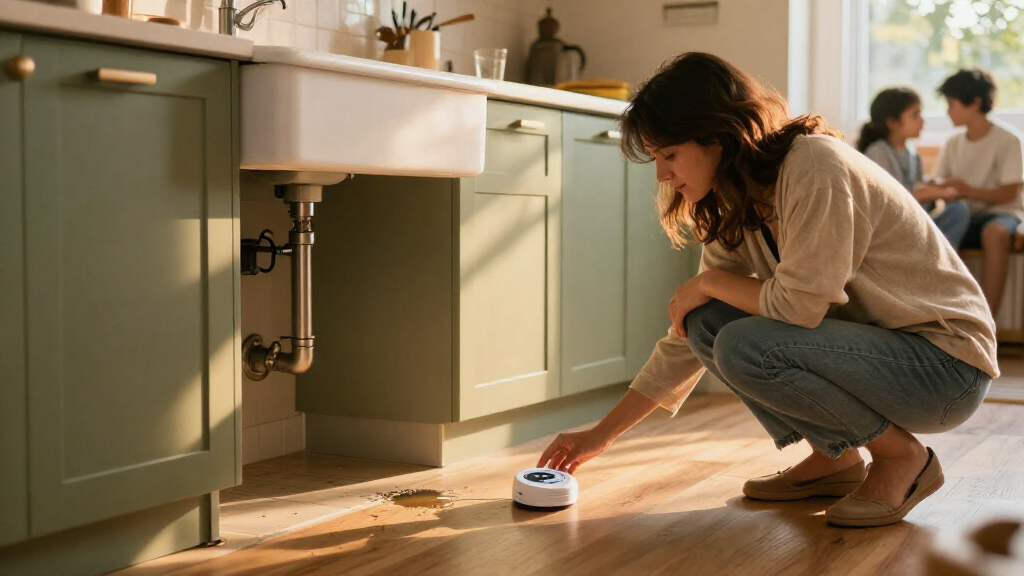

Install and test automatic water leak detectors to receive an alert when water reaches a sensor. This guide is for homeowners and renters who want early warning near plumbing, appliances, and other leak risks. Most installations take 45–90 minutes; the time depends on how many detectors you place and whether they connect to an app or hub.

Get home appliances delivered free with Prime
- Fast, free delivery on millions of items
- Prime Video, Amazon Music and more included
- Member-only deals all year

GoveeLife Upgraded Smart Water Leak Detector 1s with High Alarm, 5 Pack
- ✔ Kit contents: H5059 sensors and H5044 gateway; five-pack
- ✔ Local alarm: Up to 105 dB; four volume levels
- ✔ Remote alerts: App, SMS, and email notifications described

YoLink Water Leak Sensor 4 105 dB Alarm Kit: 4-Pack + Hub
- ✔ Kit contents: One YoLink Hub and four Sensor 4 units
- ✔ Local alarm: 105 dB built into each sensor
- ✔ Remote alerts: App, email, and SMS or text

YoLink Water Leak Sensor 1 Kit: 4-Pack + Hub
- ✔ Kit contents: One YoLink Hub and four Leak Sensor 1 units
- ✔ Local alarm: None built into sensors
- ✔ Remote alerts: App, email, and SMS or text
Difficulty: Beginner | Time: 45–90 minutes
What You’ll Need
Tools & Materials:
- Automatic water leak detectors with batteries or power supplies
- Phone or tablet for app-connected models
- Wi-Fi details and any required hub or gateway
- Clean, dry cloth
Knowledge:
- Basic ability to install batteries and use a phone app
- Access to the areas where detectors will be placed
Check the detector’s instructions for supported networks, hub requirements, battery type, and operating temperature. If you rent, avoid attaching sensors with permanent adhesive unless your landlord allows it. A detector that only sends an alert cannot shut off water; automatic shutoff requires a compatible valve system.
GoveeLife Upgraded Smart Water Leak Detector 1s with High Alarm, 5 Pack
For buyers who want a clear warning both at home and away, GoveeLife combines four remote alert routes—app, SMS, and email are described, alongside a 105 dB sensor alarm—with a five-sensor kit. The alarm has four volume levels, and the app can silence it remotely. That flexibility makes it easier to tailor the system to a basement, utility room, or vacation property than a silent sensor such as the standard YoLink Sensor 1, which requires a separate device for audible alerts.The IP67 rating is a useful fit for damp areas and accidental submersion, and the stated five-year battery life aims to reduce maintenance. Its advertised 1,804-foot connectivity is a long-range claim, though real building conditions can reduce reach. GoveeLife is also less open-ended than YoLink: the included H5044 gateway works only with specified GoveeLife sensors and requires 2.4 GHz Wi-Fi. Choose this kit for a ready-to-use mix of local noise and phone notifications; skip it if you want to expand into a broad ecosystem or need the outage-triggered actions described for YoLink.
Pros:
- Five sensors are included with a gateway for coverage across multiple locations.
- App, email, and SMS alerts are described, in addition to a 105 dB local alarm.
- Four alarm-volume settings and app-based silencing offer control over notifications.
- IP67 rating and stated five-year battery life suit low-maintenance placement in damp areas.
Cons:
- The H5044 gateway supports only specified GoveeLife sensor models and uses 2.4 GHz Wi-Fi.
- No internet-outage device-to-device actions are described, unlike the YoLink kits.
- The advertised range is a manufacturer claim and may vary with walls and layout.
Best for: Households covering several leak-prone areas that want adjustable local alarms plus app, email, and SMS notifications.
Not ideal for: Buyers who want a sensor network that can trigger compatible shutoff valves during internet outages, or who need a gateway compatible with a broader range of devices.
Bottom line: We recommend GoveeLife for its balanced combination of local alarms, remote alerts, and water-resistant construction, provided its gateway limits fit your setup.
“We recommend GoveeLife for its balanced combination of local alarms, remote alerts, and water-resistant construction, provided its gateway limits fit your setup.”
YoLink Water Leak Sensor 4 105 dB Alarm Kit: 4-Pack + Hub
The key reason to choose this YoLink kit over the standard Sensor 1 package is simple: every included Sensor 4 has a 105 dB alarm. A leak beside a water heater or washing machine can therefore make noise right where it happens, rather than relying only on a phone notification or a separately purchased siren. The kit also sends app, email, and SMS or text alerts, and its LoRa connection is designed to reach areas where Wi-Fi may struggle.Like the silent YoLink kit, it supports Control-D2D actions during internet outages, including triggering compatible YoLink sirens or shutoff valves. That makes the Sensor 4 a more complete on-site alert choice, while GoveeLife offers adjustable alarm volume and an IP67 rating that are not specified here for this YoLink kit. YoLink describes the sensors as IP67 in the item highlight and gives a typical battery life of up to five years; each uses two AAA batteries. The tradeoff is that a 105 dB alarm at each sensor may be too loud for some homes, and turning it down is not described. Pick it when immediate local sound matters more than quiet operation.
Pros:
- Each Sensor 4 includes a 105 dB audible alarm.
- App, email, and SMS or text alerts are described.
- Control-D2D can trigger compatible YoLink devices even without internet.
- LoRa communication and a stated battery life of up to five years support broad, low-maintenance coverage.
Cons:
- The built-in alarm may be too loud for bedrooms or noise-sensitive households.
- Alarm-volume adjustment is not described, unlike the GoveeLife kit.
- Its benefits are most useful within the YoLink ecosystem and with compatible devices.
Best for: Households that want each leak sensor to sound an on-site alarm while also receiving remote alerts and retaining YoLink outage actions.
Not ideal for: People who prefer silent detection points, adjustable alarm volume, or a gateway tied to a smaller, simpler system.
Bottom line: Choose Sensor 4 over the silent Sensor 1 when a leak should produce a loud warning at the detection point as well as a remote alert.
“Choose Sensor 4 over the silent Sensor 1 when a leak should produce a loud warning at the detection point as well as a remote alert.”
YoLink Water Leak Sensor 1 Kit: 4-Pack + Hub
The standard YoLink Sensor 1 makes sense when we want leak detection without a built-in sounder at every location. Its silent design avoids adding a loud alarm beside each sink, toilet, or appliance; buyers can instead add a SpeakerHub or YoLink siren if they want spoken or audible warnings. Compared with the Sensor 4 kit, this is the more flexible starting point for households that want to choose their alert hardware separately.Both YoLink kits share LoRa communication, phone and email alerts, SMS or text notifications, and Control-D2D support for triggering compatible devices during internet outages. The Sensor 1 kit also includes four sensors and a hub, and YoLink says one hub supports more than 300 devices. Its main compromise is immediate awareness: if no one is checking a phone and no optional siren or speaker is installed, the sensor itself will not make a sound. GoveeLife is more self-contained for audible alerts, while this kit is better for buyers planning a broader YoLink system.
Pros:
- Silent sensors avoid unwanted noise at each detection point.
- LoRa is designed for coverage where Wi-Fi struggles.
- Control-D2D supports actions through compatible YoLink devices during internet outages.
- The hub is described as supporting more than 300 YoLink devices.
Cons:
- There is no built-in siren; separate hardware is needed for audible or spoken alerts.
- Immediate on-site warning is less direct than with the Sensor 4 or GoveeLife kits.
- The listed kit covers four leak locations, so larger homes may need additional sensors.
Best for: Buyers who want a quiet four-location starter kit and expect to add YoLink devices or choose separate alert hardware.
Not ideal for: Anyone who needs a loud built-in alarm at each leak point without buying an additional siren or SpeakerHub.
Bottom line: Choose the Sensor 1 kit when quiet detection and YoLink expansion matter more than a built-in alarm at each leak location.
“Choose the Sensor 1 kit when quiet detection and YoLink expansion matter more than a built-in alarm at each leak location.”
As an Amazon Associate we earn from qualifying purchases.
Before You Start
Choose detectors for the environment where they will be used. Some models are designed for indoor locations only and may fail in damp, freezing, or very hot areas. Keep sensors away from standing water, routine splashes, and places where cleaning could trigger an alarm. If your home has a water shutoff valve or a leak-prone appliance, locate its shutoff before installing detectors so you can respond quickly to an alert.
Step-by-Step Instructions
Step 1: Choose the detector locations
List places where a leak could start or cause damage, then select a detector for each high-risk area. Common locations include under sinks, beside toilets, near washing machines, water heaters, dishwashers, refrigerators with water lines, and sump pumps. Put the sensor where water would collect first, such as the lowest accessible point on the floor.
Tip:Do not place a sensor where it blocks appliance ventilation, sits under a moving part, or will be routinely wet during normal use.
Check: Each planned detector has a specific location tied to a likely leak source, and you can reach it for testing or battery replacement.
Step 2: Prepare the detectors
Read the manufacturer’s setup instructions before powering each unit. Install the specified batteries or connect the approved power supply, observing the polarity marks. Remove any protective film from the contacts. If the detector has separate probe wires or a remote sensor, connect them as shown in its instructions.
Tip:Use the battery type listed by the manufacturer. Mixing old and new batteries or using a different chemistry can cause unreliable alerts.
Check: The detector powers on and shows its ready state, such as a status light, brief tone, or app message described in its instructions.
Step 3: Connect the detector to its app or hub
For a connected model, install the manufacturer’s app, create or sign in to your account, and follow its pairing instructions. Add the required hub or gateway first if the model uses one. Connect it to the supported Wi-Fi network, then pair detectors one at a time and give each a clear location name, such as “Laundry room” or “Kitchen sink.”
Tip:Many devices require a 2.4 GHz Wi-Fi network during setup. Check the product instructions if pairing fails or your router combines network bands.
Check: The app or hub lists every detector by its assigned location and shows it as online or ready.
Step 4: Place each detector
Dry the floor, then place each detector flat with its sensing contacts facing the surface as directed. Position it close enough to the leak source to detect escaping water, but leave it accessible. For a model with a remote probe, place the probe at the likely collection point and keep the main unit where its signal can reach the hub or router.
Tip:A sensor hidden behind a fixed appliance may be hard to test and may not transmit reliably. Check signal strength in the app, if available.
Check: Each unit is stable, unobstructed, and positioned where a small leak would reach its contacts before spreading far.
Step 5: Set alert preferences
Open the app settings for each connected detector and turn on the alerts you want, such as push notifications, email, or text messages if supported. Allow notifications in your phone’s system settings. Add another household member if the service permits, and choose alert names that make the location clear.
Tip:Do not rely on an app notification if your phone blocks alerts or the detector loses its internet connection. Learn whether the detector also sounds a local alarm.
Check: The app shows notifications enabled, and the detector’s contact and location details are correct.
Step 6: Test every detector
Use the detector’s test button or test procedure in its instructions. If the manufacturer recommends testing with water, apply only a small amount to the sensing contacts, then dry the unit fully after the alarm. Confirm that the local alarm sounds and that any connected app or hub reports the correct detector location. Reset the unit afterward.
Tip:Do not immerse the device or pour water into openings. Follow the model-specific test instructions to avoid damage.
Check: Each detector responds to the test, the alert identifies the right location, and the unit returns to its ready state after reset.
Step 7: Record and maintain the setup
Write down each detector’s location, model, battery type, and installation date. Save the app login and manufacturer support details somewhere accessible to household members. Set a reminder to test the detectors on the schedule in the product instructions and to replace batteries when the device or app reports low power.
Tip:After moving a detector, changing your Wi-Fi router, or replacing a hub, check its connection and run another test.
Check: You have a location list and know how to check power, connectivity, and test status for each unit.
Common Mistakes to Avoid
- Placing a detector too far from the leak source or above the floor where water would collect. — Put the sensing contacts at a low point near the appliance, pipe, or fixture, while keeping the unit accessible.
- Assuming an app-connected detector will always send an alert. — Allow notifications, check device connectivity, and test alerts on the phone you plan to rely on. Keep in mind that internet or power interruptions can affect some systems.
- Skipping the test after setup. — Test every unit and verify both its local alarm and any remote alert before relying on it.
- Using a detector in a location outside its rated conditions. — Check temperature, moisture, and placement limits in the product instructions before installation.
Troubleshooting
Problem: The detector does not power on.
Solution: Check battery orientation and type, reseat the batteries, and look for an insulating tab that needs removal. Replace the batteries if needed. For a powered model, confirm the outlet and use only the supplied or approved adapter.
Problem: The app cannot find the detector.
Solution: Move the detector closer to the hub or router, confirm the required network band, and restart pairing using the manufacturer’s steps. Check that Bluetooth or local network access is enabled if the app requires it.
Problem: The alarm sounds during normal use or cleaning.
Solution: Dry the sensing contacts and move the detector away from routine splashes or condensation. If the area is regularly damp, choose a model rated for those conditions and follow its placement guidance.
Problem: The detector alarms but no phone alert arrives.
Solution: Confirm that the detector is online, app notifications are enabled in both the app and phone settings, and the correct account is signed in. Test again and check whether the service requires a subscription or hub for remote alerts.
What Success Looks Like
The installation is complete when every detector is placed near a likely leak source, shows a ready or online status, and passes a test. For connected models, the alert should identify the correct location on the phone or hub. Household members should know where the detectors are and how to respond: inspect the area, stop the water if safe, and contact a plumber when the leak cannot be controlled.
Next Steps
Check detector status during routine home maintenance, test each unit on the manufacturer’s schedule, and replace batteries or devices when indicated. After an alert, locate the source and close the nearest safe shutoff valve if needed. If water is near electrical equipment, do not step into it or touch wet electrical devices; get qualified help. For broader protection, ask a plumber whether a compatible automatic shutoff valve suits your plumbing and detector system.
Frequently Asked Questions
Where should I put a water leak detector?
Place it on the floor near likely leak sources, including sinks, toilets, washing machines, water heaters, dishwashers, and water lines. Choose a spot where water will collect early and the detector remains accessible.
Do automatic water leak detectors shut off the water?
Most standalone detectors only sound an alarm or send a notification. A system can stop water only if it includes a compatible automatic shutoff valve that is installed and configured for that purpose.
How often should I test a leak detector?
Follow the testing interval in the manufacturer’s instructions. Test after installation, after moving the unit or changing its network setup, and after replacing batteries.
Will a detector work if the Wi-Fi is down?
Many connected models still sound a local alarm, but remote notifications may stop without internet access. Check the product instructions for offline behavior and test the local alarm.
Can I place a leak detector under a refrigerator or washing machine?
Yes, if the model is rated for that location and remains reachable for testing and battery changes. Keep it clear of moving parts, routine condensation, and areas where the appliance could damage it.