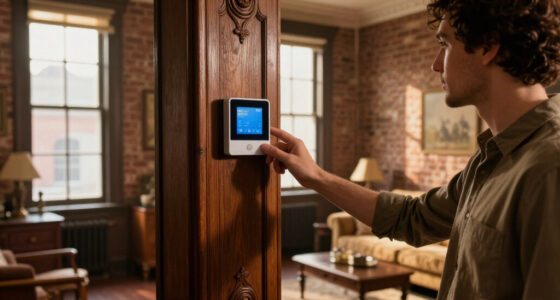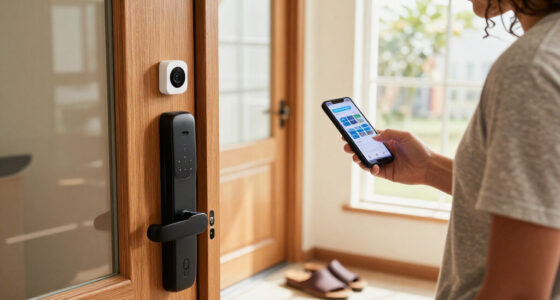
Install smart water leak detectors so they can alert you when water reaches a sensor, helping you respond before a small leak causes more damage. This guide is for homeowners and renters who can use a smartphone and follow basic device setup instructions. You will choose sensor locations, connect each detector to its app or hub, test notifications, and check that the finished setup is working. Allow about 30-60 minutes, depending on how many sensors you are installing and whether your home network needs troubleshooting.

Get home appliances delivered free with Prime
- Fast, free delivery on millions of items
- Prime Video, Amazon Music and more included
- Member-only deals all year

GoveeLife Smart Water Leak Detector, 5-Pack
- ✔ Included: 5 leak sensors and H5044 gateway
- ✔ Connectivity range: Up to 1,804 ft
- ✔ Notifications: App, SMS, and email

YoLink Water Leak Sensor Kit with Hub, 4 Sensors
- ✔ Included: 1 hub and 4 leak sensors
- ✔ Wireless protocol: LoRa
- ✔ Maximum range: Up to 2,034 ft in open air

GoveeLife Upgraded Smart Water Leak Detector, 3 Pack
- ✔ Included: 3 leak sensors
- ✔ Connectivity range: Up to 1,804 ft
- ✔ Sensor technology: 915 MHz
Difficulty: Beginner | Time: 30-60 minutes
What You’ll Need
Tools & Materials:
- Smart water leak detectors with batteries or power supplies
- A compatible smartphone or tablet
- The detector manufacturer’s app and account, if required
- Home Wi-Fi or the detector’s compatible hub or bridge
- A small amount of clean water and a cloth for testing
Knowledge:
- Basic smartphone app use
- Your home Wi-Fi name and password, if the detector uses Wi-Fi
- How to identify common plumbing fixtures and appliances
Check the package or product listing for phone, hub, Wi-Fi frequency, and smart-home compatibility before installation. Some detectors connect directly to Wi-Fi; others require a separate hub. Read the device instructions for the correct test method and any limits on water exposure. Do not place a sensor where it could obstruct a drain, become a trip hazard, or be submerged beyond the manufacturer’s stated limits.
GoveeLife Smart Water Leak Detector, 5-Pack
When we want to cover several likely leak points from one kit, the GoveeLife 5-Pack gives us the broadest ready-to-place sensor set here. We can distribute sensors near sinks, toilets, a water heater, and laundry appliances without deciding which area must wait. Like the three-pack, it pairs with the H5044 gateway and is specified for up to 1,804 feet of connectivity range; that figure is useful for planning, though actual signal reach depends on walls and layout.Its strongest practical advantage over the YoLink kit is the built-in adjustable alarm up to 105 dB. We can get an audible warning near a sensor as well as app, SMS, and email alerts. The tradeoff is a specific gateway ecosystem: H5059 sensors pair with H5044, not older H5040 or H5043 gateways, and the gateway uses 2.4 GHz Wi-Fi. The three-pack is a better match when three locations are enough; YoLink is more compelling when local triggers during internet outages matter more than a siren included with each sensor.We would choose this kit for broad room-by-room coverage and multiple alert routes. Its claimed five-year battery life can reduce routine changes, but the system still relies on batteries and a working gateway for its connected features.
Pros:
- Five sensors make it easier to cover multiple appliances and plumbing areas at once.
- App, SMS, and email alerts provide several ways to hear about a leak.
- Adjustable built-in alarm reaches up to 105 dB.
- IP67 rating and claimed battery life of up to five years.
Cons:
- Requires the H5044 gateway and 2.4 GHz Wi-Fi.
- H5059 sensors do not pair with H5040 or H5043 gateways.
- The included sensors rely on AAA batteries that will eventually need replacement.
Best for: Households that want to monitor several leak-prone spots with app, SMS, and email alerts plus a local sensor alarm.
Not ideal for: People who already own an H5040 or H5043 gateway, need a gateway that works on 5 GHz Wi-Fi, or only need one or two sensors.
Bottom line: For broad coverage with built-in alarms and several notification routes, this is the most complete single-kit choice in the lineup.
“For broad coverage with built-in alarms and several notification routes, this is the most complete single-kit choice in the lineup.”
YoLink Water Leak Sensor Kit with Hub, 4 Sensors
The YoLink kit takes a different approach to connectivity. Its LoRa sensors have a stated range of up to 2,034 feet in open air, the longest figure among these kits, which may suit a property where Wi-Fi struggles to reach a basement, outbuilding, or distant utility area. We should treat that number as a best-case planning reference: walls and other obstructions can reduce real-world reach.Its standout distinction is what compatible YoLink equipment can do when the internet is down: sensors can trigger compatible devices locally. That gives the kit an edge over the GoveeLife options for someone building a broader YoLink setup that needs local responses. However, the four sensors have no built-in siren. To get an audible alert, we need a compatible speaker hub or siren, whereas each GoveeLife sensor provides an adjustable alarm. YoLink also lists app, email, and text alerts, so remote notification still depends on connectivity.We would pick YoLink for range flexibility and local device automation, not as the simplest alarm-in-the-box option. Its hub supports more than 300 YoLink devices, offering room to expand, but that ecosystem commitment and the extra hardware needed for sound make it less turnkey than GoveeLife.
Pros:
- Four sensors and a hub are included for multi-area monitoring.
- LoRa communication has a stated open-air range up to 2,034 feet.
- Can trigger compatible YoLink devices locally during internet outages.
- Hub supports more than 300 YoLink devices for potential expansion.
Cons:
- Sensors have no built-in siren; audible alerts require compatible equipment.
- The stated maximum range is for open-air conditions and may not reflect a building.
- Adding sound alerts means buying or using another compatible device.
Best for: People monitoring distant areas or planning a YoLink system that can trigger compatible devices locally during internet interruptions.
Not ideal for: Buyers who want a loud alarm included with every sensor or prefer a simple kit without adding compatible YoLink alert devices.
Bottom line: Choose YoLink when long-range communication and local triggers during an internet outage outweigh the need for a built-in sensor siren.
“Choose YoLink when long-range communication and local triggers during an internet outage outweigh the need for a built-in sensor siren.”
GoveeLife Upgraded Smart Water Leak Detector, 3 Pack
For a compact monitoring plan, the GoveeLife 3-Pack keeps the main strengths of its five-sensor sibling while reducing the number of included sensors. It offers the same stated 1,804-foot connectivity range, IP67 waterproof protection, app, SMS, and email alerts, and an adjustable alarm up to 105 dB. That makes it easier to choose if we have three priority locations, such as a water heater, laundry area, and sink cabinet.Compared with the five-pack, the limitation is straightforward: we have fewer sensors ready to place, so covering every possible leak point may require another purchase. Compared with YoLink, GoveeLife includes a siren in each sensor, but it lacks YoLink’s stated local device-trigger behavior during an internet outage. The GoveeLife kit also depends on the H5044 gateway, and the sensors are not compatible with H5040 or H5043 units.This is the sensible GoveeLife choice when three sensors match our actual plan. Its up-to-five-year battery claim and multiple notification routes help reduce upkeep and improve reach, though app-based setup and alarm silencing mean the system is not entirely independent of a phone.
Pros:
- Three sensors provide focused coverage for common leak points.
- App, SMS, and email notifications support remote awareness.
- Adjustable alarm reaches up to 105 dB.
- IP67 protection and claimed battery life of up to five years.
Cons:
- Requires the H5044 gateway; older H5040 and H5043 gateways are incompatible.
- Uses six AAA batteries that will eventually need replacement.
- Setup and alarm silencing depend on the mobile app.
Best for: People who want GoveeLife’s long-range alerts and built-in alarms for three priority leak locations.
Not ideal for: Households that need five or more monitored areas, already have an incompatible GoveeLife gateway, or want local triggers during internet outages.
Bottom line: This is the better GoveeLife fit when three sensors are sufficient and built-in alarms matter more than YoLink’s outage-trigger feature.
“This is the better GoveeLife fit when three sensors are sufficient and built-in alarms matter more than YoLink’s outage-trigger feature.”
As an Amazon Associate we earn from qualifying purchases.
Before You Start
Make a quick list of the areas you want to monitor, such as under sinks, beside a washing machine, near a water heater, and by a refrigerator with an ice maker. Sensors work best where water would collect first, rather than on a raised shelf or in a spot that stays wet during ordinary use. Check each planned location for normal condensation, routine splashing, and cleaning water that could cause nuisance alerts. If a detector includes a cable probe, note that the probe and the main unit may cover different areas. Keep the app open during setup and have the manufacturer’s instructions available in case the pairing or testing process differs by model.
Step-by-Step Instructions
Step 1: Choose the areas to monitor
Walk through your home and identify plumbing connections, appliances that use water, and places where a leak could spread out of sight. Start with areas near sinks, toilets, dishwashers, washing machines, water heaters, and refrigerator water lines. Add locations near a sump pump or other equipment if a leak or overflow there could affect the home. Choose a spot at floor level where water is likely to reach the sensor. If one area is large or has several possible leak points, plan for more than one sensor or use a model with a probe that can reach the vulnerable connections.
Tip: Avoid placing a detector directly under a faucet where ordinary drips or cleaning splashes could trigger it.
Check: You have a list of specific sensor locations, each tied to a likely source of water.
Step 2: Prepare each detector
Unpack the detectors and check that each unit, battery, probe, and mounting accessory is present. Install the batteries or connect the power supply as the instructions describe, checking the polarity marks before closing the compartment. Inspect the sensor contacts and probe cable for visible damage. If the model uses a replaceable battery, note the battery type so you can replace it later. Keep the detector dry during preparation and do not test it by pouring water onto the main unit unless its instructions specifically allow that.
Tip: If a detector has a pull tab, remove it only when the instructions say the unit is ready to power on.
Check: The detector powers on or gives the startup signal described by its manufacturer.
Step 3: Install the app and add the device
Install the manufacturer’s app from your phone’s official app store, then sign in or create an account if the setup requires one. Turn on Bluetooth or location access if the app requests it for device discovery. Follow the app’s add-device instructions and scan a code or select the detector model when prompted. Connect the detector to the required Wi-Fi network or hub. Enter the Wi-Fi password carefully, and keep the phone close to the detector while pairing. If you use a hub, power it on and complete its setup before adding sensors that depend on it.
Tip: Check the device label or app instructions for supported Wi-Fi bands. Some devices cannot join a 5 GHz network.
Check: The app lists the detector as connected, online, or ready, with no pairing error.
Step 4: Name each detector by location
Give the detector a short name that identifies its exact location, such as “Kitchen sink” or “Laundry floor.” If the app supports rooms, assign the detector to the correct room as well. Place the device near the location it monitors, then confirm that the name in the app matches the physical sensor. For a cable probe, make a note of where the probe ends so you can recognize which part detected water. Clear names help you find the right sensor quickly when an alert arrives.
Tip: Use a specific fixture or area in the name when you have multiple detectors in the same room.
Check: You can match every sensor shown in the app to a physical location without guessing.
Step 5: Position the sensors
Place each detector on a clean, dry, stable surface near the floor, with its sensing contacts facing the surface as directed. Set it where water from the monitored fixture would naturally collect, but keep it clear of drains, moving appliance parts, and footpaths. For a probe model, route the probe to the likely leak point without pinching it under an appliance or stretching it tightly. Secure any cable with the supplied clips if needed. Do not put the device inside a cabinet if the sensor contacts would sit above the cabinet floor or the unit could not be heard or reached.
Tip: If the floor slopes, place the sensor at the low point where water would gather.
Check: Each sensor sits securely in a dry, accessible position where a leak is likely to reach its sensing surface.
Step 6: Set alert and sharing options
Open the detector’s settings and turn on the leak notifications you want to receive. Allow the app to send notifications in your phone’s system settings, and check that alerts are not silenced by a focus mode or notification schedule. If the detector supports multiple contacts, add household members who should know about a leak and confirm that each person can receive alerts. Review any optional email, text, or smart-home alert settings. Do not assume that an alarm will reach you when the phone is offline; check the manufacturer’s explanation of local alarms and remote notifications.
Tip: Choose a notification sound you can distinguish from routine app messages.
Check: The app shows notifications as enabled, and the phone allows notifications from that app.
Step 7: Test the leak alert
Use the test method in the detector instructions. For models with exposed contacts, this may involve briefly touching a small amount of water to the sensing points; for other models, the app may provide a test command. Keep water away from battery compartments, charging ports, and parts the manufacturer says to keep dry. Watch for the detector’s alarm and check whether the app reports a leak. If remote alerts are part of your setup, confirm that a notification appears on the phone. Dry the sensor completely after a water test and reset it using the stated procedure.
Tip: Do not skip this test. A powered sensor can still be unpaired, muted, or unable to reach your phone.
Check: The detector signals the test, the app records the event or shows an alert, and the sensor returns to its ready state after drying and reset.
Step 8: Record the setup and check the signal
Confirm that every detector appears online in the app and that its name and room are correct. Check the battery or device-health status, if available. If the app reports a weak connection, move the detector or hub to improve coverage, then check the status again. Write down each sensor’s location, model, and battery type in a place household members can find. Explain where the detectors are and what to do if one alarms: check the area safely, stop the water source if possible, and contact a plumber or building manager when needed.
Tip: Keep detector locations accessible so you can inspect, test, and replace batteries without moving heavy equipment.
Check: All sensors show a healthy connection, and someone else in the household can identify their locations and respond to an alarm.
Common Mistakes to Avoid
- Leaving a sensor wet after testing, which can trigger repeat alarms or prevent it from returning to ready status. — Dry the sensing contacts fully and use the manufacturer’s reset procedure after each water test.
Troubleshooting
Problem: The app cannot find or pair with the detector.
Solution: Move the phone close to the detector, confirm it has power, and check that Bluetooth or other requested phone permissions are enabled. Restart pairing using the manufacturer’s steps. Verify the Wi-Fi band and hub requirements, then retry with the correct network details.
Problem: The detector alarms during normal use or cleaning.
Solution: Check whether splashes, condensation, or routine floor washing reach the sensing contacts. Move the sensor slightly away from the source while keeping it in the likely path of a leak. Dry and reset the device, then test it again.
Problem: The detector sounds, but no phone alert appears.
Solution: Check app notification permissions, the phone’s silent or focus settings, and the detector’s online status. Confirm that the app account has the correct contact details and that remote alerts are enabled. Repeat the alert test after correcting the settings.
Problem: The app shows the detector offline or with a weak signal.
Solution: Check the battery or power connection first. Move the hub closer to the detector or reduce obstacles between them, then refresh the app status. For a Wi-Fi model, check that the network is working and that the detector is within range.
What Success Looks Like
The setup is complete when every detector is placed at a planned leak point, has a clear location name, and appears healthy in the app. A test produces the expected local alarm and, when configured, a phone notification. After testing, the sensor is dry and back in its ready state. Household members know where the sensors are and how to respond if one alerts.
Next Steps
Check the app or device indicator periodically for low batteries, offline sensors, and missed updates. Follow the manufacturer’s schedule for battery replacement and repeat the leak alert test after changing a battery, moving a detector, replacing a hub, or changing your Wi-Fi setup. Keep sensors clear of dust and stored items, and inspect probe cables for damage. If an alarm indicates an active leak, avoid electrical hazards, shut off the affected water supply if you can do so safely, and contact a plumber or building manager for help.
Frequently Asked Questions
Where should I put smart water leak detectors first?
Start near sinks, toilets, washing machines, dishwashers, water heaters, and refrigerator water lines. Prioritize places where a leak could go unnoticed or damage floors, walls, or stored belongings. Put each sensor where water will reach its contacts early.
Do smart leak detectors work without Wi-Fi?
It depends on the model. Some detectors sound a local alarm without internet access, while remote phone alerts may require Wi-Fi, a hub, or an active service. Check the product instructions for which functions continue during an internet outage.
How can I test a leak detector safely?
Follow the model’s stated test procedure. Use only a small amount of water on the sensing contacts if the manufacturer permits that method, and keep water away from parts that must stay dry. Confirm the alarm and app response, then dry and reset the detector.
Can one detector cover several appliances?
A detector covers the spot where its sensing contacts or probe can detect water. A probe may reach a nearby connection, but water on the far side of a room may never reach it. Use separate detectors for distant leak points.
What should I do when a detector alerts?
Go to the named location and look for the source of water, taking care around electrical equipment or standing water. Shut off the relevant fixture or supply valve if it is safe to do so. Dry the area only after the leak source is controlled, and contact a plumber or building manager if you cannot stop the leak.