Installing a PEX manifold makes each water line serviceable by allowing you to control and isolate individual fixtures easily. Start by choosing a central location near your main water supply and make certain there’s enough space for the manifold and piping. Properly connect each line with secure fittings and include a pressure regulator for consistent water flow. Label each outlet for quick identification later. If you keep going, you’ll discover how to optimize your system for easy maintenance and long-term reliability.
Key Takeaways
- Choose a central, accessible location for the manifold to facilitate serviceability of all lines.
- Properly label each line and outlet for easy identification during maintenance or repairs.
- Use secure fittings and ensure leak-proof connections to prevent future issues.
- Incorporate shut-off valves on each line for independent control and quick serviceability.
- Test pressure and flow thoroughly before finalizing installation to confirm all lines are functioning properly.
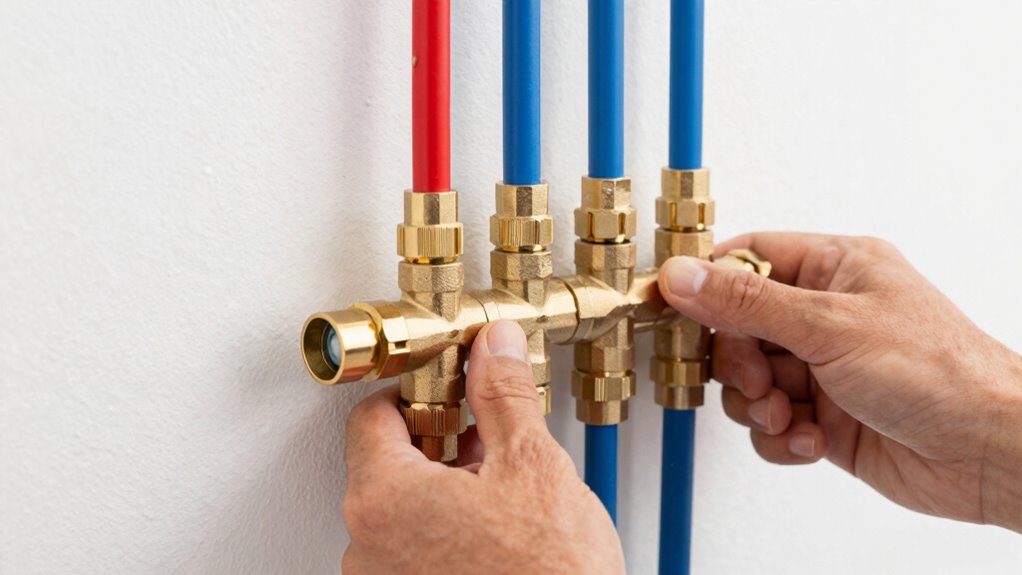
Installing a PEX manifold is a straightforward process that can substantially simplify your plumbing system. Once you set it up, you’ll notice how much easier it becomes to control water flow to different fixtures, making repairs and maintenance much quicker. Before you begin, guarantee your workspace is clear, and you have all the necessary tools and materials ready. Choosing the right location for your manifold is essential; place it in a central spot, ideally near your main water supply, so you can efficiently distribute water to various parts of your home.
Installing a PEX manifold simplifies plumbing and streamlines water distribution throughout your home.
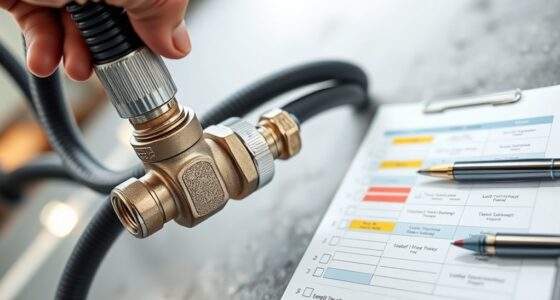
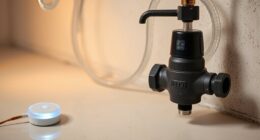
When installing the manifold, you’ll want to focus on securing your PEX lines properly. Use appropriate fittings and guarantee each line connects tightly to prevent leaks. It’s also important to contemplate water pressure management. Installing a pressure regulator before the manifold can help maintain consistent water pressure throughout your system, which protects the pipes and fixtures from damage caused by pressure fluctuations. This step is especially critical if you live in an area with high water pressure, as it ensures your system operates smoothly and prolongs the lifespan of your plumbing.
Pipe insulation plays a significant role in maximizing the efficiency of your plumbing system once the manifold is installed. Insulating your PEX lines helps prevent heat loss in hot water lines and reduces the risk of freezing during colder months. When installing pipe insulation, make sure to cover all visible sections of the PEX pipes, especially those running through unheated spaces like basements or attics. Proper insulation not only conserves energy but also minimizes the chances of pipe damage that could lead to leaks or bursts, saving you money and hassle down the line. Additionally, considering local building codes can help ensure your installation meets safety standards and regulations.
As you connect each branch line from the manifold to individual fixtures, double-check that all connections are secure and leak-free. Turn on the main water supply gradually to test each line for proper water flow and pressure. Adjust the flow as needed to guarantee each fixture receives adequate water without causing stress on the pipes. Remember, the goal is to make every line serviceable, so labeling each outlet can save time during future repairs or upgrades.
Throughout the installation process, pay close attention to pipe insulation and water pressure control. These steps guarantee your system runs efficiently, reduces energy costs, and minimizes potential damage. Once everything is in place and tested, you’ll enjoy a more organized, reliable plumbing system where each line is easily accessible for maintenance. Installing a PEX manifold not only streamlines your plumbing but also provides peace of mind, knowing your home’s water supply is optimized and protected.

50143 Pex Manifold Compatible with Viega Manabloc, Homerun Distribution Pex Manifold with Valves, 1/2-Inch Zero Lead Poly Alloy PEX Crimp With 14 Ports Adapters(8 Cold, 6 Hot),Suitable for crimping
CENTRALIZED CONTROL: The PEX manifold enables centralized management of all household water lines by integrating hot and cold…
As an affiliate, we earn on qualifying purchases.
As an affiliate, we earn on qualifying purchases.
Frequently Asked Questions
What Tools Are Necessary for PEX Manifold Installation?
You need a few essential tools for PEX manifold installation. Grab a PEX cutter to guarantee clean cuts, a crimp or clamp tool for secure fittings, and a drill for mounting the manifold. Don’t forget pipe insulation to protect your lines and a pressure gauge for water pressure testing. These tools help you create a reliable, serviceable system, making maintenance easier and ensuring your plumbing functions correctly.
How Do I Troubleshoot Leaks in the Manifold System?
When troubleshooting leaks in your manifold system, start with leak detection by visually inspecting all connections for drips or moisture. Use sealing techniques like tightening fittings carefully or applying plumber’s tape to secure connections. If leaks persist, gently recheck each joint, ensuring proper fit and pressure. Remember, patience and a keen eye are your best tools—address small issues early to keep your system running smoothly and efficiently.
Can I Install a Manifold Outdoors?
Yes, you can install a manifold outdoors, but make certain it’s designed for outdoor durability. Use weatherproofing techniques like sealing connections tightly, applying appropriate protective coatings, and placing the manifold in a sheltered location. Choose materials rated for outdoor use, and consider additional insulation if temperatures drop. Proper weatherproofing keeps the system functioning reliably and prevents leaks or damage caused by the elements, ensuring long-lasting, serviceable lines.
What Is the Lifespan of a PEX Manifold?
Think of your PEX manifold as a trusty lighthouse guiding your water flow; with proper care, it can last 50 years or more. The PEX manifold lifespan depends on installation quality and water conditions. While corrosion is rare, it can affect longevity if exposed to harsh elements. Regular inspections and maintenance help prevent manifold corrosion, ensuring your system remains reliable, and your water lines stay serviceable for decades.
How Do I Replace a Faulty Valve on the Manifold?
To replace a faulty valve on your manifold, start by turning off the main water supply. Then, carefully disconnect the faulty valve using a wrench, taking care not to damage the manifold. Install the new valve by tightening it securely and ensuring proper connections. This process is part of manifold repair, and doing it correctly keeps your system running smoothly. Always double-check for leaks before restoring full water pressure.

1" 100' 5 wrap Insulated Pex Tubing Outdoor Wood Stove
Non Barrier
As an affiliate, we earn on qualifying purchases.
As an affiliate, we earn on qualifying purchases.
Conclusion
With your new PEX manifold installed, imagine each line branching out like a tree’s sturdy limbs, ready to deliver water smoothly and reliably. Every connection is a pathway, easily accessible and serviceable, ensuring you’ll never be left in the dark when issues arise. As you step back, visualize your system humming quietly behind the walls, a well-organized network you built yourself. Now, enjoy the peace of mind that comes with a clean, efficient, and easily maintainable plumbing setup.

Apollo Valves ApolloPEX 3/4" Bronze Double Union PEX Water Pressure Regulator w/Gauge (APXPRV34WG)
Compact design with lead-free bronze construction and integrated internal by-pass mechanism
As an affiliate, we earn on qualifying purchases.
As an affiliate, we earn on qualifying purchases.

Watflow Water Gauge Pressure, Flow, & PSI Test Gauge,0-160psi,0-13 GPM, 3/4" Female Hose Thread.
SIZE: 2-1/2"dial size, 3/4"NPT solid brass gate valve,3/4" hose male ,compatible with all us water sources.
As an affiliate, we earn on qualifying purchases.
As an affiliate, we earn on qualifying purchases.