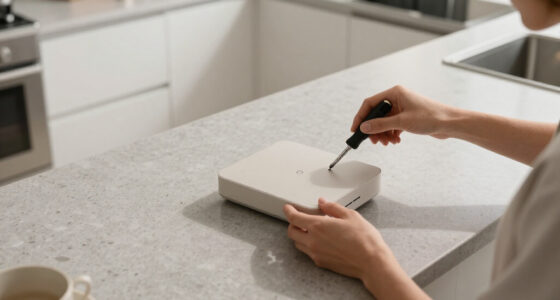

Install smart water leak detectors around likely leak sources, connect them to your phone or smart home system, and test their alerts. This guide is for homeowners and renters who can use a smartphone app and place small battery-powered devices; no plumbing work is required. Allow 30-60 minutes, depending on how many detectors you are setting up.

Get home appliances delivered free — and shop member deals
- Fast, free delivery on millions of items
- Access to Prime Big Deal Days deals on October 6–7
- Prime Video, Amazon Music and more included

GoveeLife Smart Water Leak Detector, 5-Pack
- ✔ Pack size: 5 sensors
- ✔ Wireless range: Up to 1,804 ft
- ✔ Alarm: Up to 105 dB; 4 volume levels

GoveeLife Smart Water Leak Detector, 3-Pack
- ✔ Pack size: 3 sensors
- ✔ Wireless technology: Sub-1G
- ✔ Wireless range: Up to 1,804 ft

GoveeLife Smart Water Leak Detector, 6-Pack
- ✔ Pack size: 6 sensors
- ✔ Wireless technology: Sub-1G
- ✔ Connectivity range: Up to 1,804 ft, including through walls
Difficulty: Beginner | Time: 30-60 minutes
What You’ll Need
Tools & Materials:
- Smart water leak detectors compatible with your Wi-Fi, hub, or smart home platform
- Smartphone with the detector manufacturer’s app installed
- Fresh batteries or included power supplies
- Home Wi-Fi details, if the detector connects directly to Wi-Fi
- Paper towel or small amount of water for testing, as directed by the manufacturer
Knowledge:
- Basic smartphone app use
- Ability to identify sinks, appliances, and other likely leak sources
Check the package or manufacturer’s app for required hubs, supported network bands, battery type, and phone compatibility. Some detectors need a separate hub, and some connect only to a 2.4 GHz Wi-Fi network. Do not place a test device where water could damage flooring or electrical equipment.
GoveeLife Smart Water Leak Detector, 5-Pack
The 5-Pack strikes a useful middle ground for a home with several likely leak points: under sinks, beside a washing machine, near a water heater, or around a refrigerator. Compared with the 3-Pack, it gives us two additional sensors to spread coverage without requiring the largest set in this lineup. Its app, SMS, and email alerts provide several ways to learn about a leak when we are away, while the 105 dB adjustable alarm can alert people nearby. The IP67 rating is suited to damp environments, and the stated battery life of up to five years could reduce routine battery changes.The main catch is the same one buyers face with the other GoveeLife sets: these sensors need a compatible gateway on 2.4 GHz Wi-Fi. We should check whether that gateway is included or already available and verify compatibility before planning a whole-home setup. The 6-Pack is a better fit if six coverage points are immediately useful; the 3-Pack keeps the initial setup smaller. For many households that need more than a starter trio, however, this five-sensor set balances coverage and practicality.
Pros:
- Five sensors cover more locations than the 3-Pack
- App, SMS, and email leak alerts
- Adjustable alarm up to 105 dB and IP67-rated sensors
- Claimed battery life of up to five years
Cons:
- Requires a compatible GoveeLife gateway
- Gateway supports only 2.4 GHz Wi-Fi
Best for: Households that want to monitor several common leak locations and value multiple remote alert channels.
Not ideal for: Buyers who need a standalone sensor, cannot use 2.4 GHz Wi-Fi, or already know they need six sensors.
Bottom line: We recommend the 5-Pack for a balanced spread of leak coverage, provided the gateway requirement fits our setup.
“We recommend the 5-Pack for a balanced spread of leak coverage, provided the gateway requirement fits our setup.”
GoveeLife Smart Water Leak Detector, 3-Pack
When we only need to monitor a few priority spots, the 3-Pack keeps the system focused. Three sensors can cover, for example, the water heater, kitchen sink, and washing machine, while the shared GoveeLife feature set still includes app, SMS, and email notifications, IP67-rated sensors, and an adjustable alarm up to 105 dB. Its stated wireless range of up to 1,804 feet may help connect sensors placed away from the gateway, though walls and home layout can affect real-world performance.Compared with the 5-Pack, this set is easier to match to a smaller home or a targeted first installation, but it leaves fewer sensors for adding bathrooms or appliances later. The 6-Pack is the more suitable choice when broad coverage is already the goal. We should also account for the gateway: the sensors are not a standalone smart alert system and rely on compatible GoveeLife hardware using 2.4 GHz Wi-Fi. Choose this set for a deliberate three-location plan, and skip it if we would quickly need to protect more areas.
Pros:
- Three sensors suit a focused installation
- App, SMS, and email notifications
- Sub-1G wireless range stated up to 1,804 feet
- IP67-rated sensors and adjustable alarm
Cons:
- Fewer sensors than the 5-Pack and 6-Pack
- Requires a compatible gateway with 2.4 GHz Wi-Fi
Best for: Apartment dwellers or homeowners who want to monitor three specific high-risk locations.
Not ideal for: People planning broad coverage across many rooms or anyone seeking sensors that connect without a compatible gateway.
Bottom line: We would choose the 3-Pack when three locations are enough and a smaller coverage plan is the priority.
“We would choose the 3-Pack when three locations are enough and a smaller coverage plan is the priority.”
GoveeLife Smart Water Leak Detector, 6-Pack
The 6-Pack is the straightforward choice when we have a longer list of places to monitor. Six sensors can cover a mix of bathrooms, sinks, laundry equipment, and utility areas without leaving as many gaps as the smaller sets. Like the other two, it combines app, SMS, and email alerts with a flashing red light and an audible alarm adjustable up to 105 dB. The stated range of up to 1,804 feet, including through walls, is intended to help distribute sensors around a home, while its IP67 rating is useful where splashes or damp conditions are possible.Those extra sensors are its defining advantage over the 5-Pack; the core alert and alarm features are broadly shared, so buyers with only three or five target locations may find the smaller sets more appropriate. The six sensors still depend on a compatible gateway and 2.4 GHz Wi-Fi, and compatibility is limited to the H5059 and H5830 sensor families as described. This is the set to consider when extensive coverage is the priority, not when we want the fewest components or a gateway-free setup.
Pros:
- Six sensors offer the broadest coverage in this comparison
- App, SMS, and email alerts with flashing red light
- Adjustable audible alarm up to 105 dB
- IP67 rating and stated range up to 1,804 feet
Cons:
- Requires a compatible gateway on 2.4 GHz Wi-Fi
- Compatible only with the specified H5059 and H5830 sensors
Best for: Larger households or homeowners who want to monitor six separate leak-prone locations from the start.
Not ideal for: Buyers with only a few target areas, or those who cannot use the required compatible 2.4 GHz gateway.
Bottom line: We recommend the 6-Pack when covering the greatest number of leak-prone spots matters more than keeping the setup small.
“We recommend the 6-Pack when covering the greatest number of leak-prone spots matters more than keeping the setup small.”
As an Amazon Associate we earn from qualifying purchases.
Before You Start
Choose devices that can send alerts in the way you need. A local alarm can sound at home, while app notifications can reach you away from home; remote alerts may depend on an internet connection, hub, subscription, or cloud service. Read the device’s testing instructions before adding water, since some models have specific sensor contacts or test methods.
Plan detector locations before pairing. Put sensors close to likely leak points, but leave them accessible for battery changes and testing. Keep them away from routine splashes, drains, and areas where condensation or cleaning water could cause repeated alerts.
Step-by-Step Instructions
Step 1: Choose detector locations
Walk through your home and mark spots near water supply lines and appliances that could leak. Prioritize under kitchen and bathroom sinks, beside toilets, near water heaters, washing machines, dishwashers, refrigerators with water lines, and sump pumps. Place the sensor where water would collect first, such as the lowest accessible point beside the appliance.
Keep the detector on a stable surface and within the communication range stated by its manufacturer. Avoid putting it directly under a drip that could fall onto the sensor during normal use, or where routine mopping will wet it.
Tip: A detector cannot shut off a valve unless it is part of a compatible shutoff system. Treat an alert as a warning to inspect the area and stop the water source if needed.
Check: You have a location list that covers the most likely leak sources and leaves each detector accessible.
Step 2: Install batteries or connect power
Open each detector’s battery compartment or connect its power supply as described in the manual. Match battery polarity marks, use the specified battery type, and close the compartment fully. If the device has a pull tab, remove it to activate the battery.
Look for the startup signal, such as a light, tone, or message in the app. Keep the detector near your phone or hub during setup if the manufacturer recommends it.
Tip: Do not mix old and new batteries or substitute rechargeable batteries unless the manufacturer allows them; voltage differences can affect operation.
Check: Each device powers on and gives the startup indication described in its instructions.
Step 3: Add detectors in the app
Open the manufacturer’s app, sign in or create an account, and choose its option to add a device. Follow the prompts to scan a QR code or enter the detector’s setup code. Connect it to the required hub or Wi-Fi network and wait for the app to confirm pairing.
Name each detector by its location, such as “Kitchen sink” or “Water heater.” If the app asks for room, notification, or household settings, choose the correct options so alerts are easy to identify.
Tip: If the device will not pair, check whether your phone and detector are on the required network band and whether the hub is powered and online. Keep the detector close during initial pairing.
Check: The app lists every detector with a distinct location name and shows it as connected or ready.
Step 4: Set alert and household options
Enable leak notifications in the app and allow notifications in your phone’s system settings. If multiple people should respond to leaks, invite them to the household account or configure shared alerts using the app’s available options. Set any sound, quiet-hour, or escalation preferences that the device supports.
Check whether remote notifications require a subscription or internet access. Keep a local alarm enabled where available, especially in rooms where a leak could go unnoticed.
Tip: A phone’s focus mode, battery saver, or notification permissions can silence alerts. Review those settings for the app after setup.
Check: The app shows leak alerts as enabled, and the phone is permitted to display notifications from it.
Step 5: Place each detector
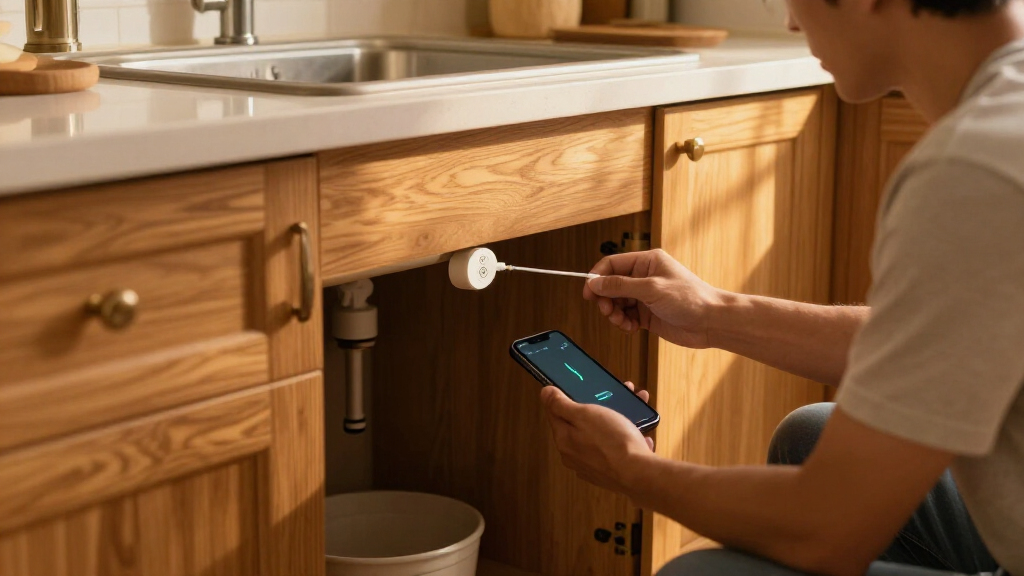
Put each detector at its planned location with its sensing contacts positioned as the manual specifies. For a puck-style device, orient the exposed contacts toward the floor. For a probe connected by cable, place the probe at the low point and keep the main unit where it can communicate with the hub or network.
Do not bury the detector behind stored items or attach it where it could be knocked loose. Leave enough clearance to remove it and inspect the area during routine checks.
Tip: Do not place devices on metal surfaces or inside closed cabinets unless the manufacturer says that location is supported; materials and enclosures can weaken wireless signals.
Check: Each detector sits flat or has its probe secured at the intended low point, and the app still shows it as connected.
Step 6: Test detection and alerts
Use the manufacturer’s test procedure for each detector. If the instructions call for wetting the contacts, use a damp paper towel or a small amount of water on the sensing area, away from electronics and flooring that water could damage. Wait for the local alarm and app notification, then dry the detector completely and reset or dismiss the alert as directed.
Repeat the test for every unit. Check that the notification names the correct location and, if you rely on remote alerts, verify the app can reach your phone when you are away from the home network.
Tip: Some models test the siren or connection without simulating a leak. Follow the manual’s distinction between a self-test and a water-detection test.
Check: Each detector responds to its prescribed test, and the alert identifies the correct device and location.
Step 7: Record locations and maintenance dates
Write down each detector’s location, battery type, and installation date, or save those details in the app if it offers device notes. Add a reminder to test the sensors and check batteries at the interval recommended by the manufacturer.
Keep the manual, hub details, and replacement battery information where household members can find them. Show anyone who may respond to an alert how to locate the detector and shut off the relevant water supply if they can do so safely.
Tip: Replace batteries when the app or device signals low power. A connected detector with a depleted battery cannot sense a leak reliably.
Check: You can identify every detector’s location and know when and how to check it.
Common Mistakes to Avoid
- Placing a sensor too far from the likely leak path or on a surface where water will not reach it. — Put the sensing contacts at the low point near the appliance or pipe connection, and confirm the placement against the device instructions.
- Assuming the detector will notify you remotely without completing app or network setup. — Enable app alerts, grant phone notification permissions, and test a real alert through the method you expect to use.
- Skipping the water-detection test after pairing. — Test every detector using the manufacturer’s procedure and confirm that the alert shows the correct location.
- Leaving a sensor where normal splashes, cleaning, or condensation trigger alarms. — Choose a nearby spot that catches an actual leak while staying clear of routine water exposure.
Troubleshooting
Problem: The detector does not pair with the app or hub.
Solution: Move it closer to the hub or router, confirm the required network band, and check that Bluetooth, location, or local network permissions are enabled if the app requests them. Restart setup using the manual’s reset procedure.
Problem: The app shows the detector as offline after placement.
Solution: Move the detector closer to the hub or router and check for interference from cabinets, appliances, or metal surfaces. Confirm the hub or router has internet access, then reopen the app and check the device status.
Problem: The detector sounds, but no phone alert appears.
Solution: Turn on alerts in the app and in the phone’s notification settings. Check focus or do-not-disturb modes, battery restrictions, account sharing, and any subscription requirement for remote notifications.
Problem: The detector triggers an alert when there is no leak.
Solution: Dry the sensing contacts, check for condensation or routine splashes, and move the detector to a nearby drier position that still catches water. Clean it only as the manufacturer directs.
What Success Looks Like
The installation is complete when each detector is powered, named by location in the app, and positioned near a likely leak source. Every unit should pass its prescribed detection test, produce the expected local response, and send an app alert to the intended phone or household members. The app should show devices online, and you should know how to locate and maintain them.
Next Steps
Check device status and battery warnings regularly, and repeat the manufacturer’s sensor test on its recommended schedule. Recheck placement after moving appliances, plumbing work, or storage changes. If you receive an alert, inspect the named area promptly, dry the sensor after resolving the leak, and contact a plumber when the source is not safe or practical to repair yourself.
Frequently Asked Questions
Where should I place smart water leak detectors?
Place them near likely leak sources, including under sinks, beside toilets, washing machines, dishwashers, water heaters, refrigerators with water connections, and sump pumps. Choose a low point where escaping water will reach the sensor, while avoiding routine splashes and cleaning water.
Do smart leak detectors need Wi-Fi?
It depends on the model. Some connect directly to Wi-Fi; others use a separate hub, and some only sound a local alarm. Check the product requirements to confirm whether remote app alerts need Wi-Fi, a hub, internet service, or a subscription.
How do I know whether a leak detector works?
Run the test specified by the manufacturer. Confirm that the detector responds locally and that the app displays an alert with the right device name. A connection or siren self-test may not test the water-sensing contacts, so check which procedure the manual requires.
Can I put a detector under a refrigerator or washing machine?
Yes, if the sensor can sit securely where water would collect and can still communicate with its hub or network. Keep it accessible for testing and battery changes. A probe model can help reach a low or narrow space, if the manufacturer supports that setup.
Will a leak detector stop the water automatically?
Most standalone detectors only sound an alarm and send a notification. Automatic shutoff requires a compatible valve or shutoff system, which may need installation on the water line. Check compatibility and installation requirements before buying or connecting that equipment.
Fall yard work Picks
leaf blowers
As an affiliate, we earn on qualifying purchases.